Popsicle Stick House
How to make a Popsicle Stick House and Garden with template
How to make a popsicle stick house? This post summarizes the most common practices and include helpful free drawings. Not only that, here you can also buy special drawings designed by FoBIRD.
1/The first model of popsicle stick house that we introduce, is also the simplest popsicle stick house model. So we’ve summarized how in the video below, and of course you can also download the popsicle stick template for free.
Tutorial video:
2/ The model is inspired by winter, with white snow covered. With this home template you can decorate with Christmas items, Happy New Year or any other theme you want.
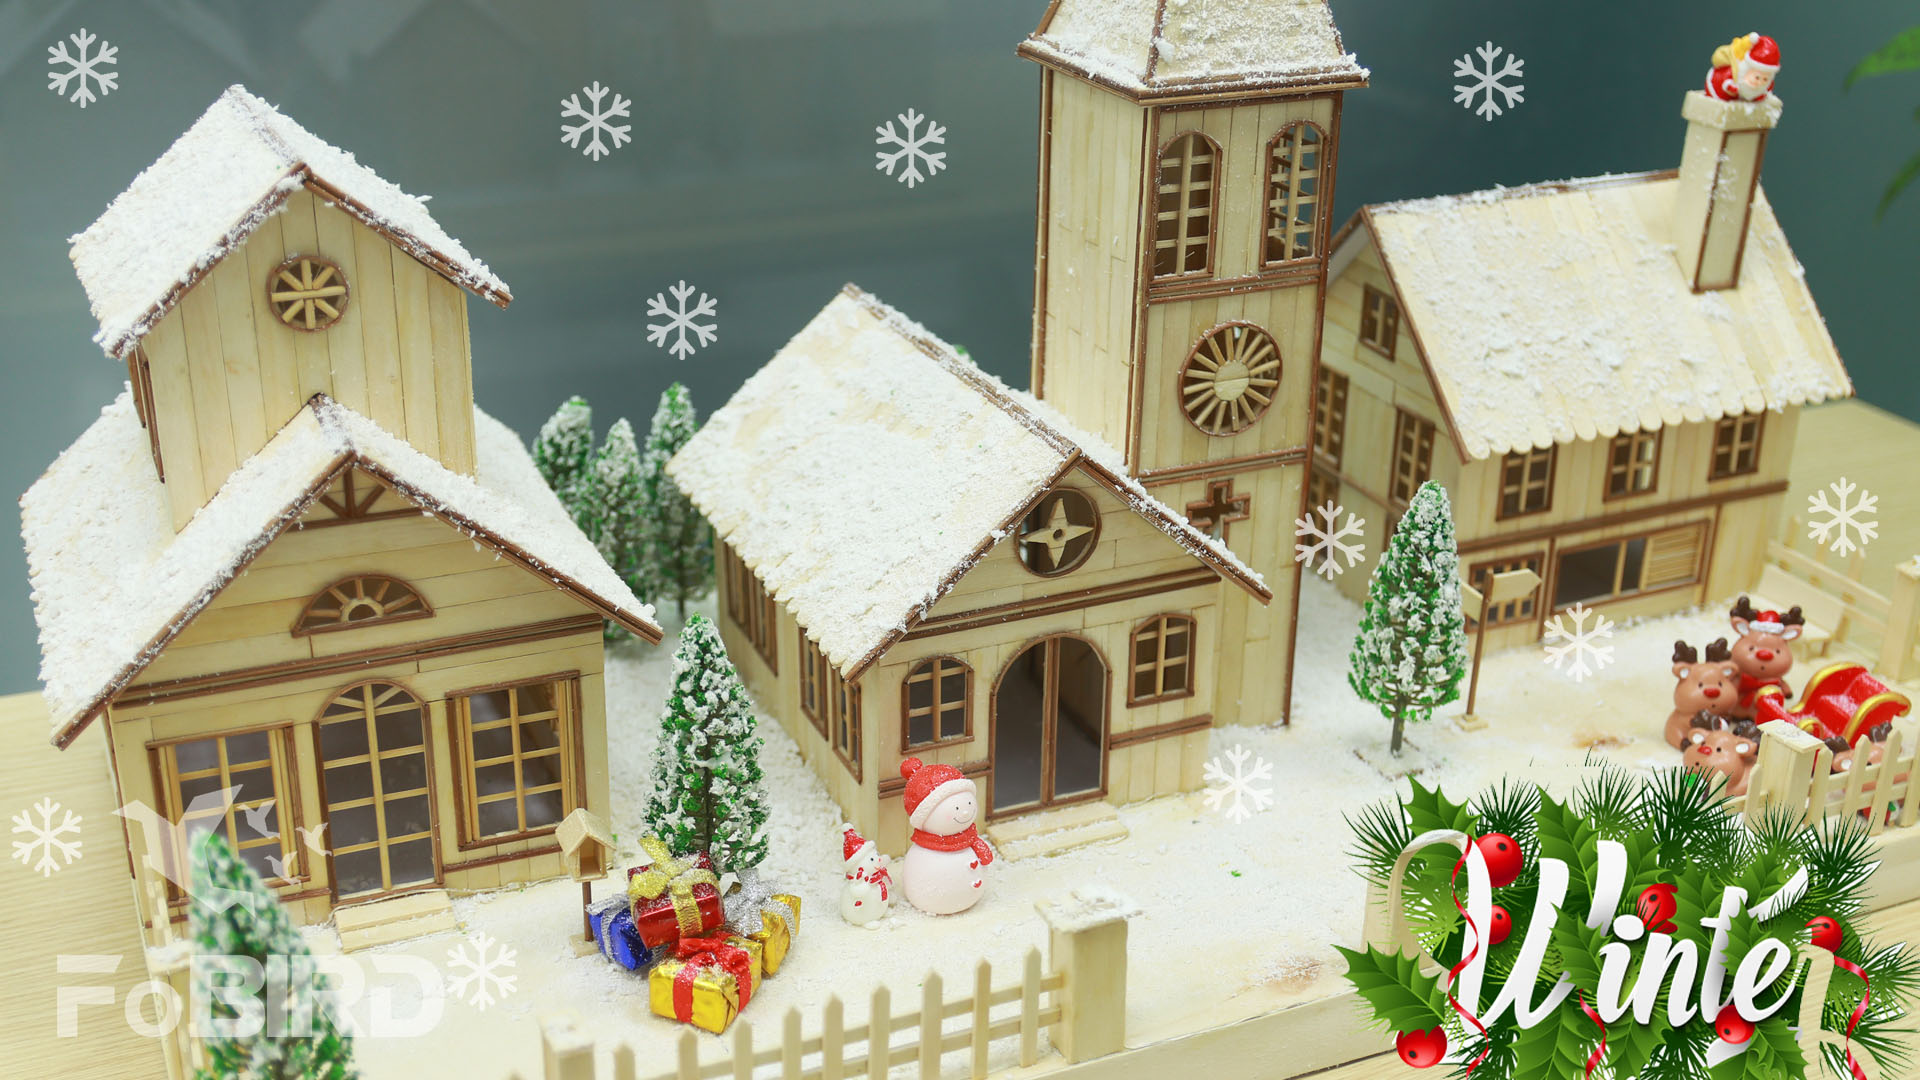
The material KIT includes:
- Detailed blueprint
- Popsicle sticks in 1*11.5cm
- Brown wooden sticks
- Decorative tree models
- Lawn model
- Specialized wooden ice cream sticks scissor
- Glue sticks, hotmelt glue gun
- Craft knife
Tutorial video:
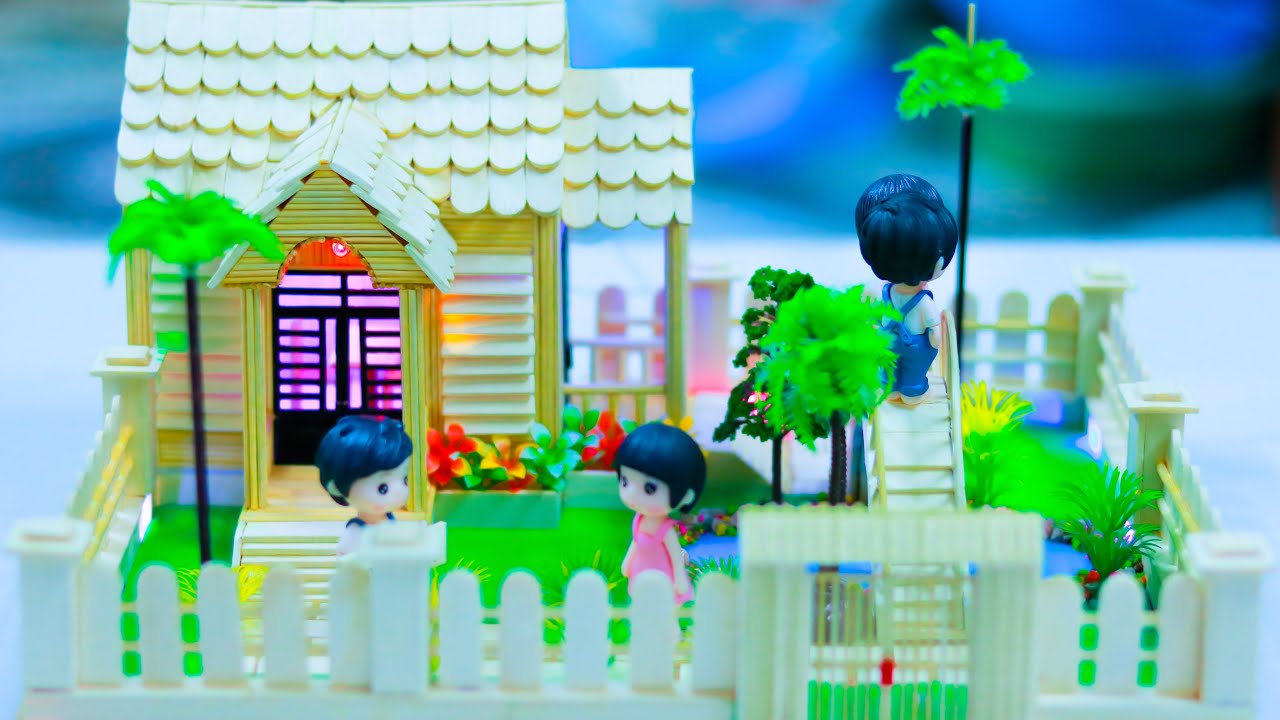
3/ The simplest way to make a house model with a garden and swimming pool using Popsicle sticks
In the previous article, we showed you how to make a house model using ice cream sticks with a large garden. However, that’s a model of a villa and it can be relatively difficult for beginners to make. Therefore, The first part of this article, we will guide you on a simpler way to make an ice cream house model. The main design includes an extremely cute small house surrounded by a romantic garden. Let’s keep track of the following steps.
The material KIT includes:
- Detailed blueprint
- Popsicle sticks in 1*11.5cm
- Decorative tree models (trees with red flowers, trees with yellow flowers, pines, bushes)
- Matboard
- Lawn model
- Blue colored paper to make a small lake
- Trees and flowers
- Specialized wooden ice cream sticks scissor
- Glue sticks, hotmelt glue gun
- Craft knife
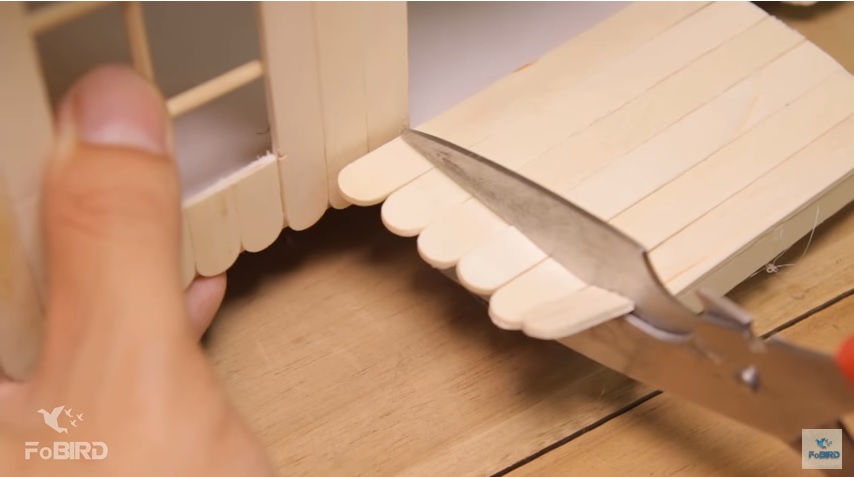
In the material list above, we use a special tool called “specialized wooden ice cream stick scissor”. This is the scissor that we usually use when making models using ice cream sticks and toothpicks. With this scissor, cutting ice cream sticks becomes an easy and effortless process. Plus, the sticks will not break when you cut them. If you are making the ice cream house model then this is a must-have tool.
The steps:
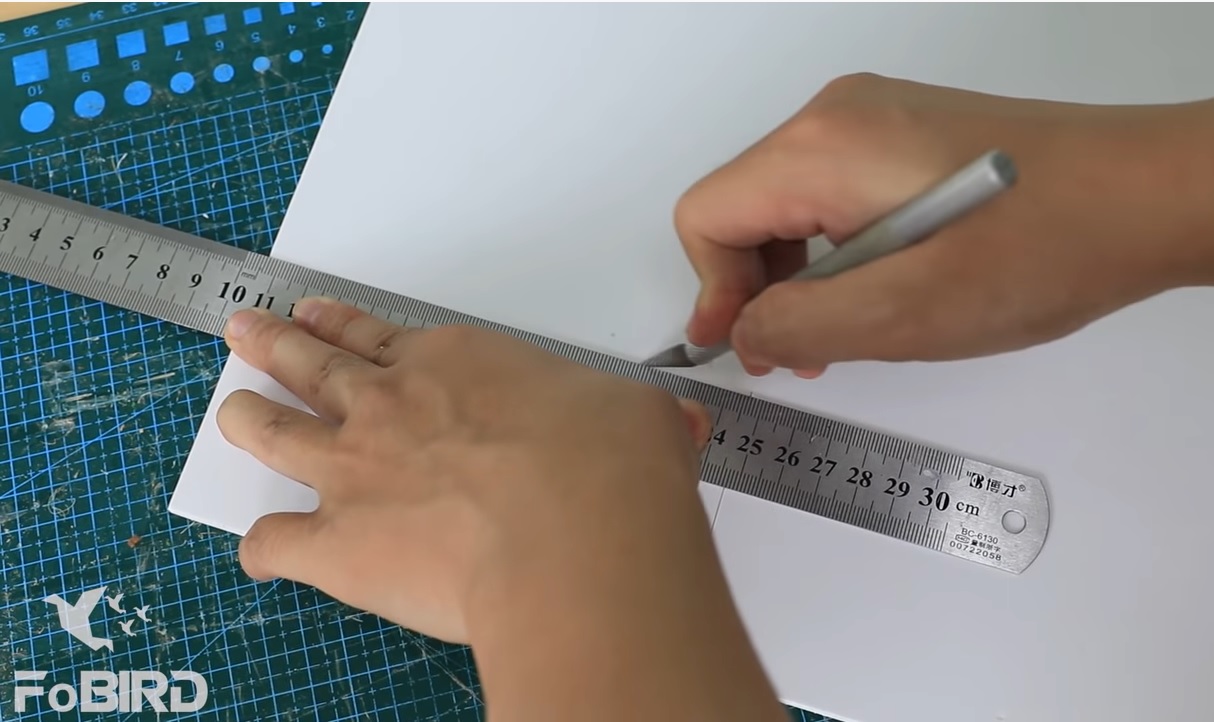
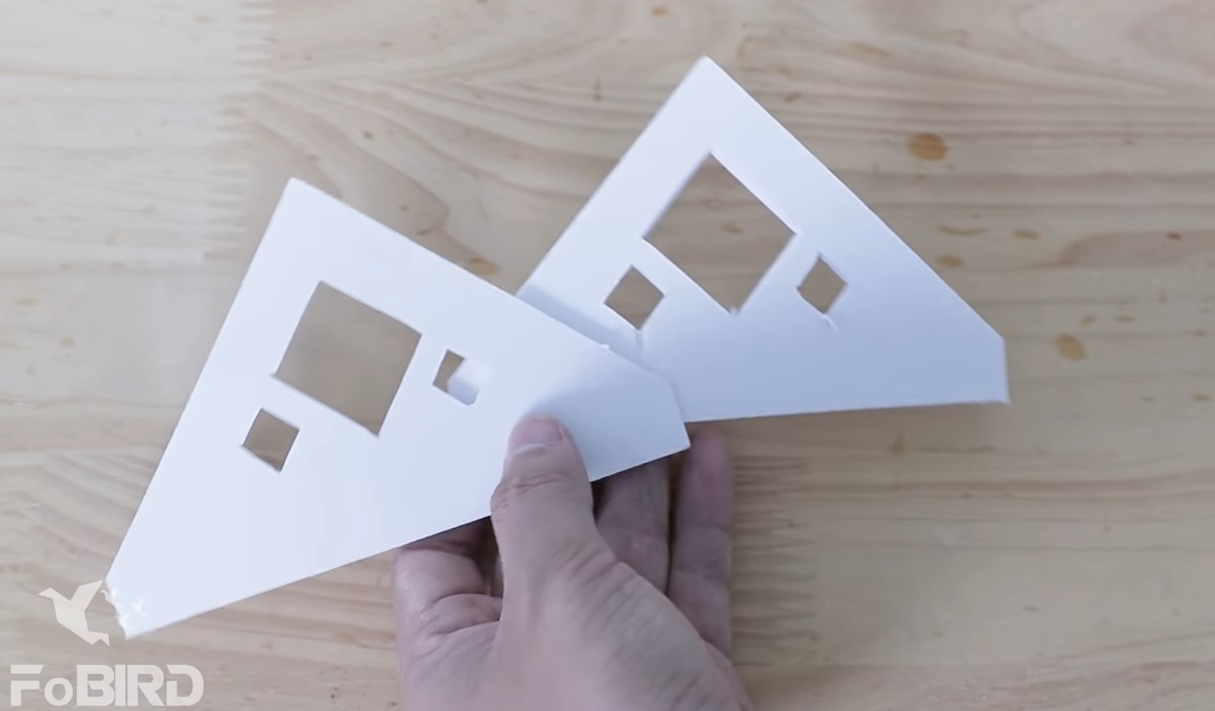
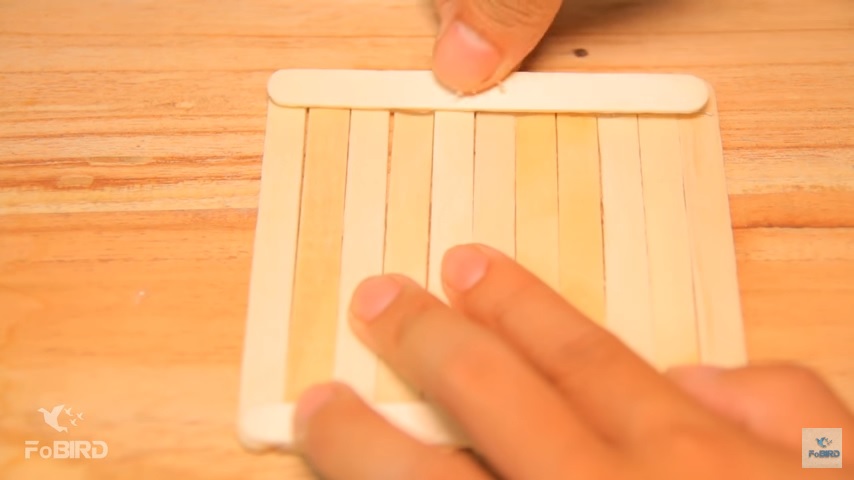
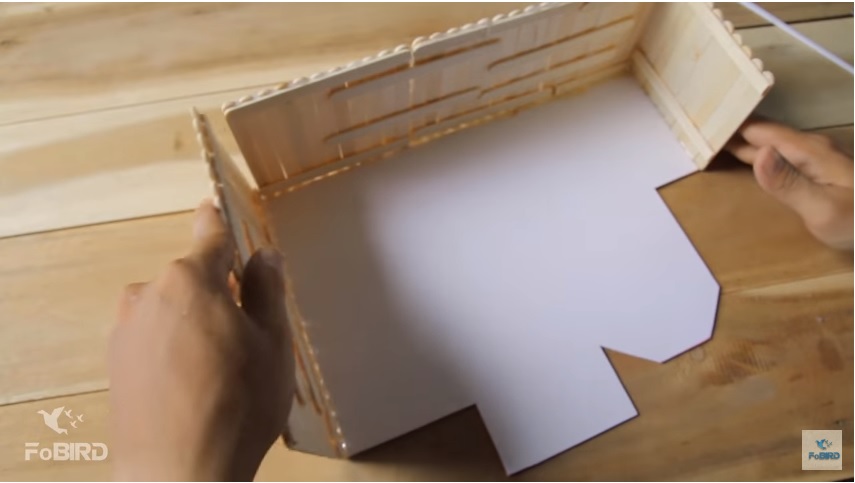
The first and most important step to make a house is the details of the walls. To make the walls in the simplest and easiest way, we need to prepare a big foam board, then measure and cut it into smaller pieces according to the size in the blueprint.
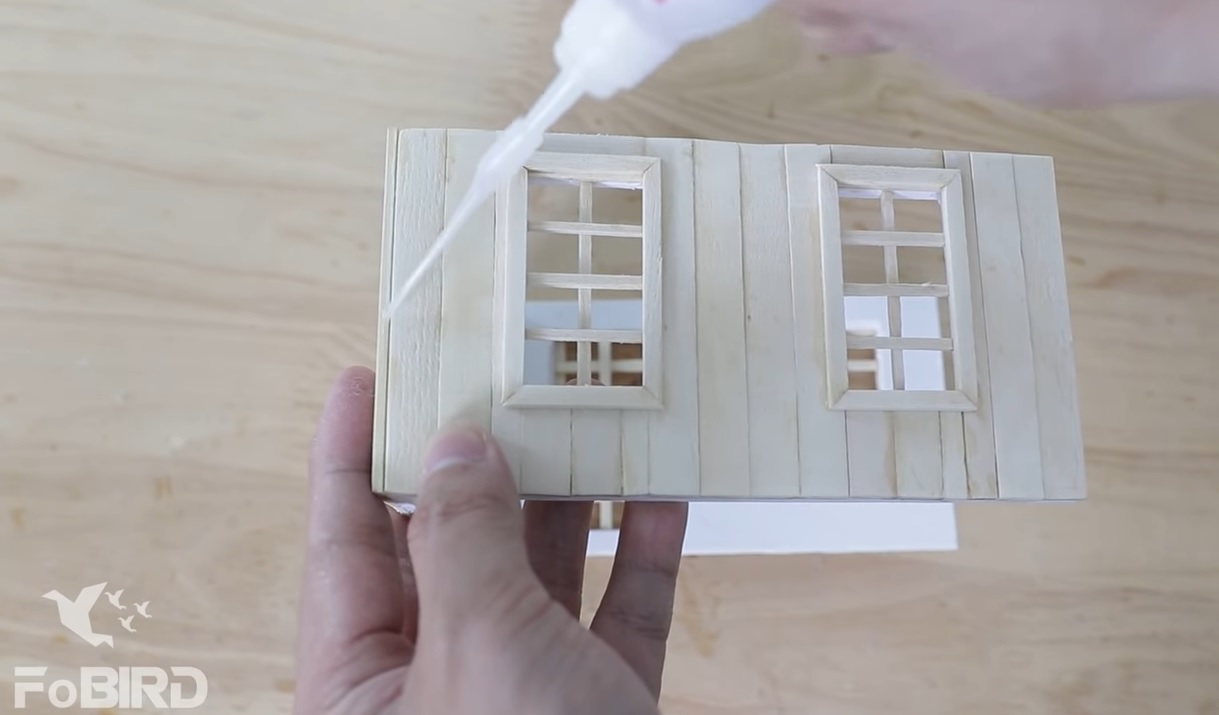
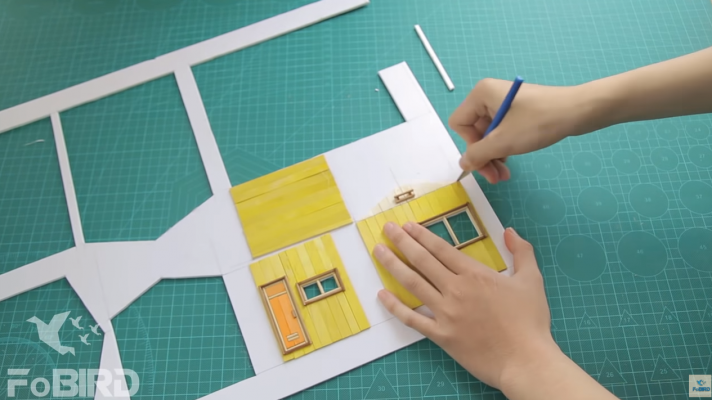
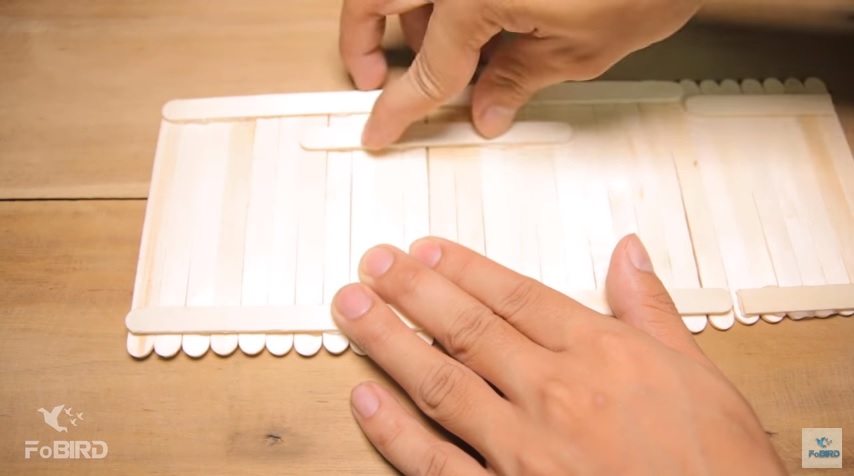
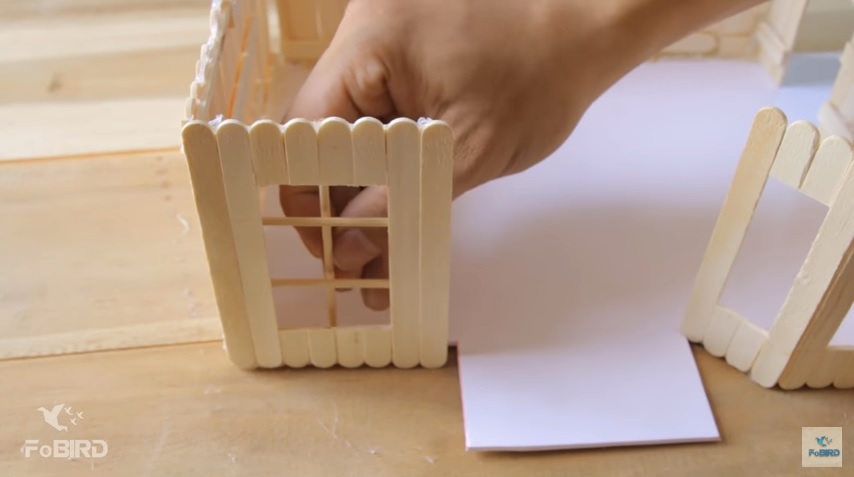
After cutting the matboardwe use the wooden ice cream sticks that have been cut into the given size and attach them to the foam board, arrange and attach each stick closely together. Depending on each wall to arrange different windows and doors. We use the craft knife to cut the sticks into smaller pieces to make window bars and door trims.
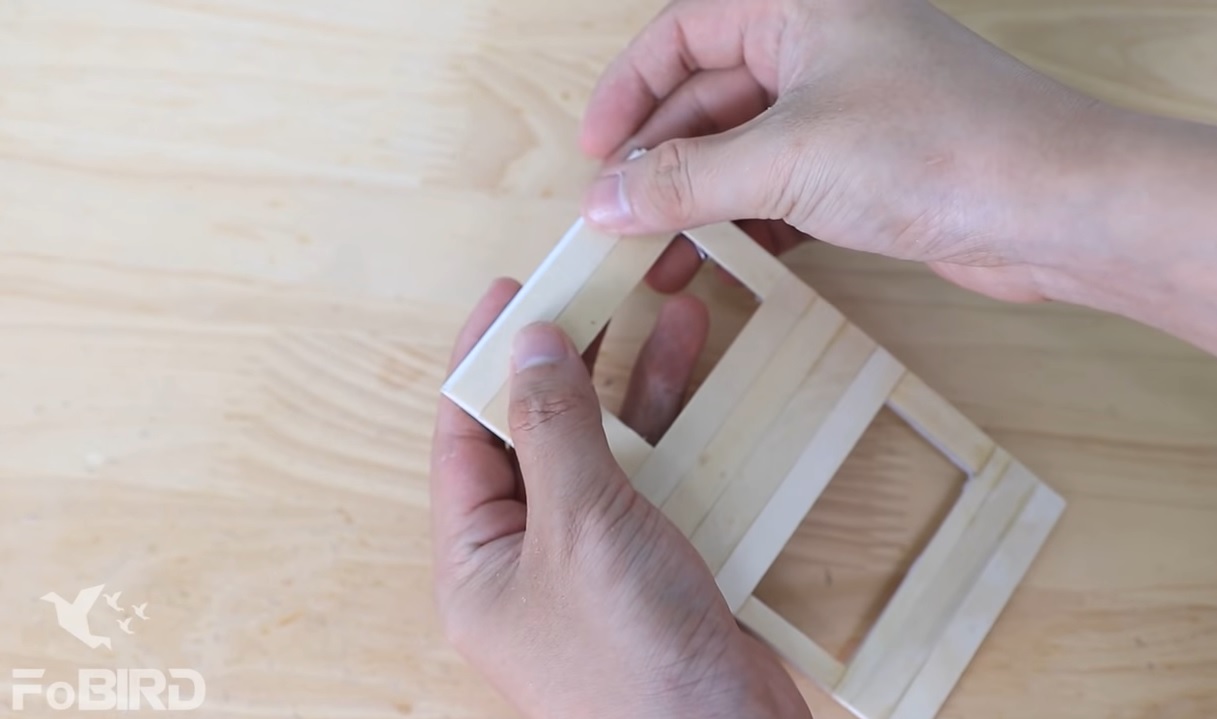
Glue the pieces carefully to make the window bars balanced and aligned.
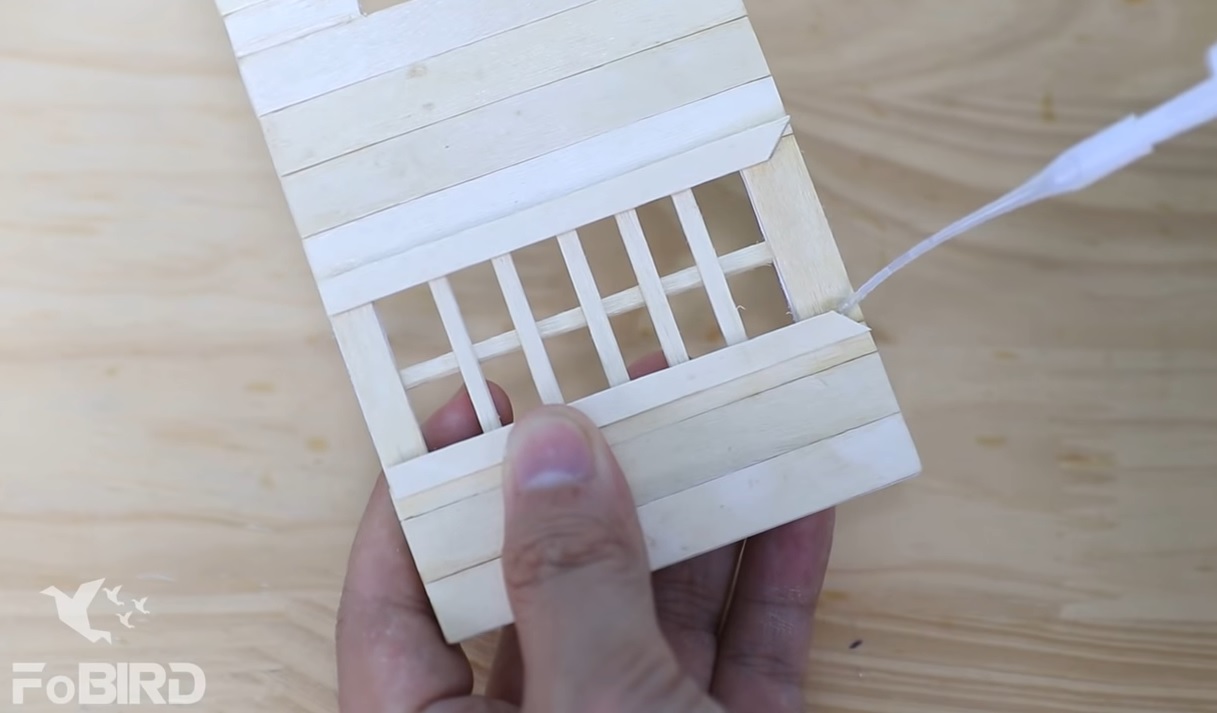
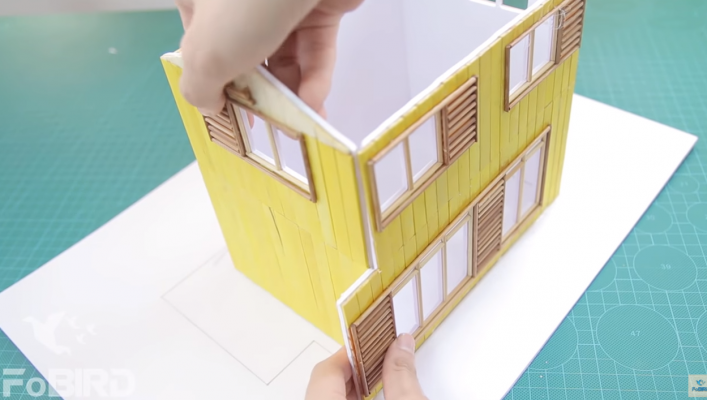
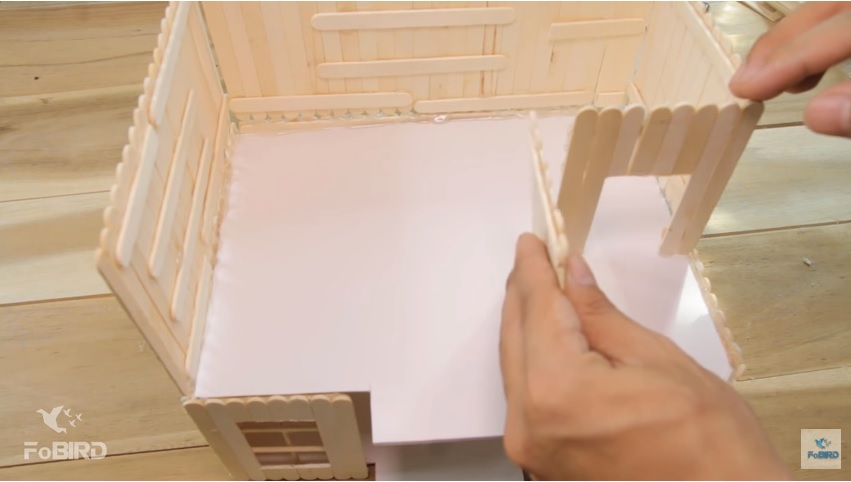
According to the blueprint, we need to make 4 walls like this to make the house’s frame.

Attach 4 walls together perpendicularly and steadily, so we have basically completed the frame of the house.
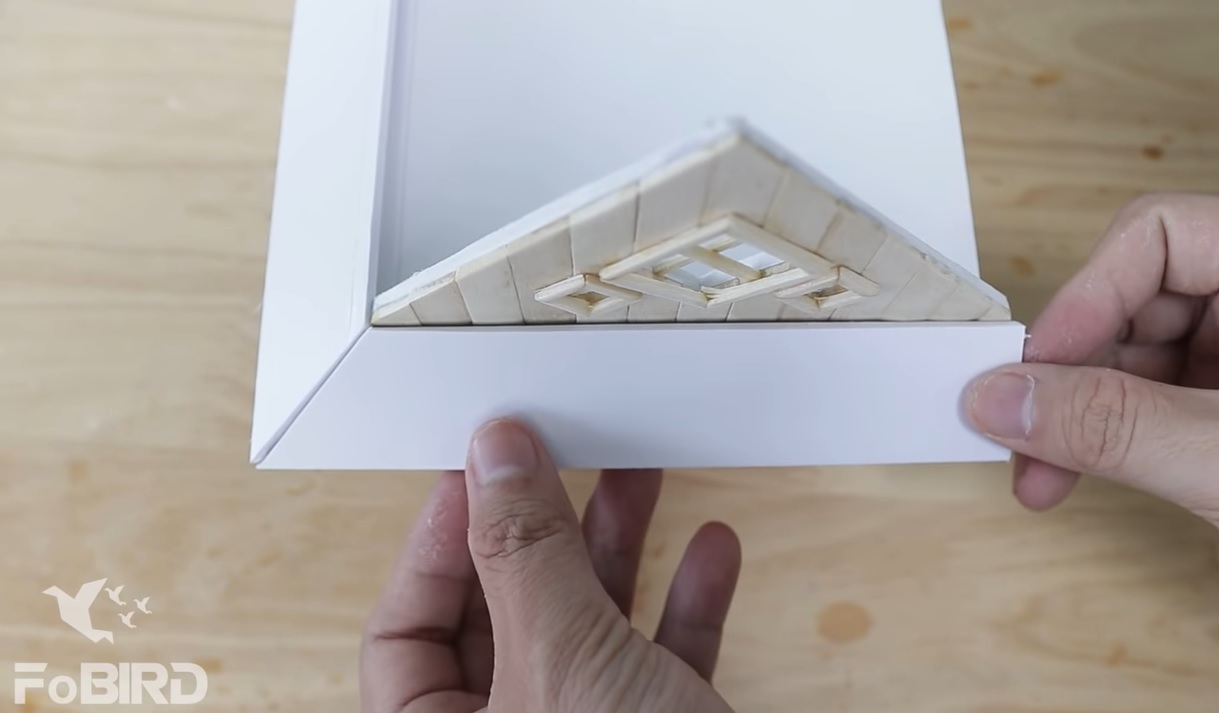
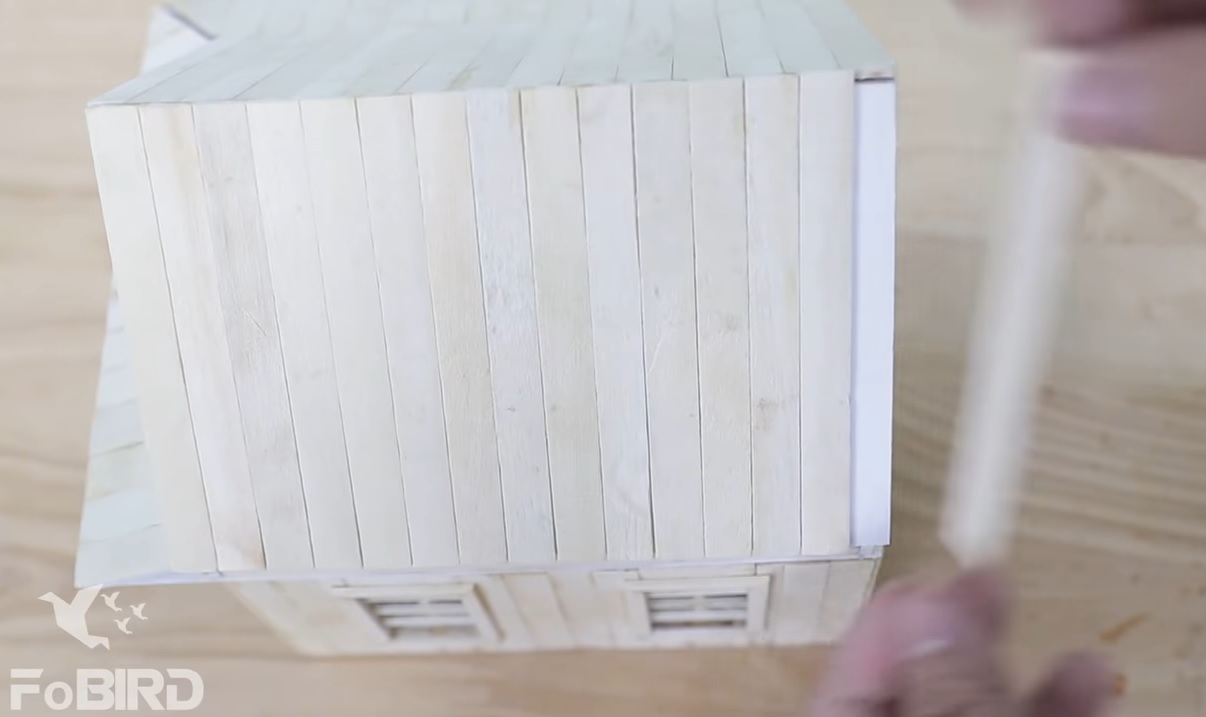
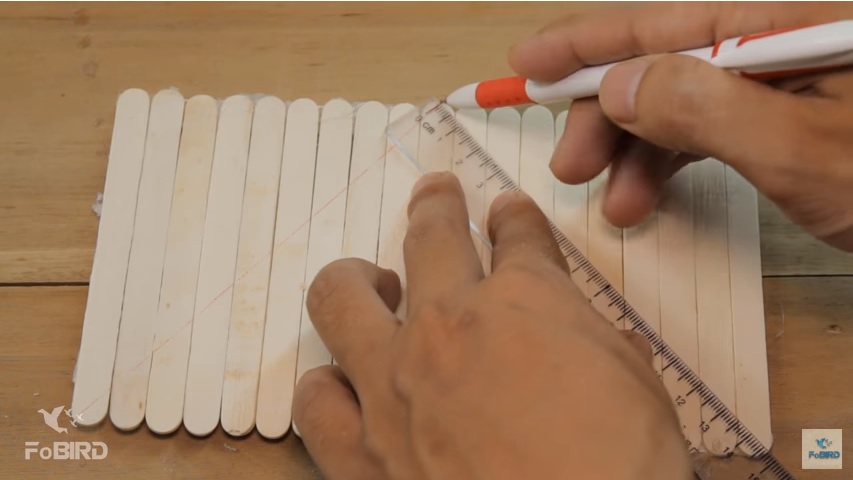
Next, we move to the roof. Similar to the above, we also cut the matboardto make the frames of 2 sides of the roof first, and then it will be much easier to cover them with the sticks.
You should choose the sticks that are the same size and the sides of the sticks are not broken, so the space between the sticks will be smaller, gives you a better final product.
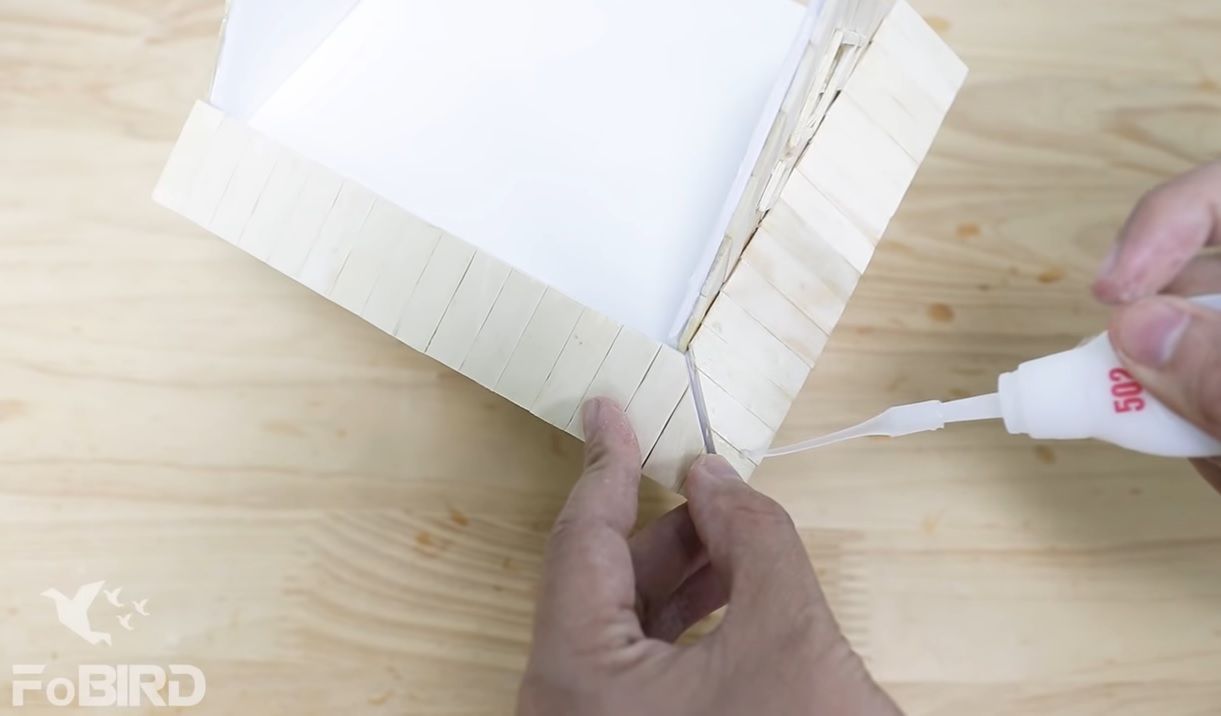
Next, we use a matboardas the ceiling, then glue the side of the roof perpendicular to the ceiling, you need to glue it firmly and pay attention to the 2 sides so that they are parallel to avoid the roof being skewed.
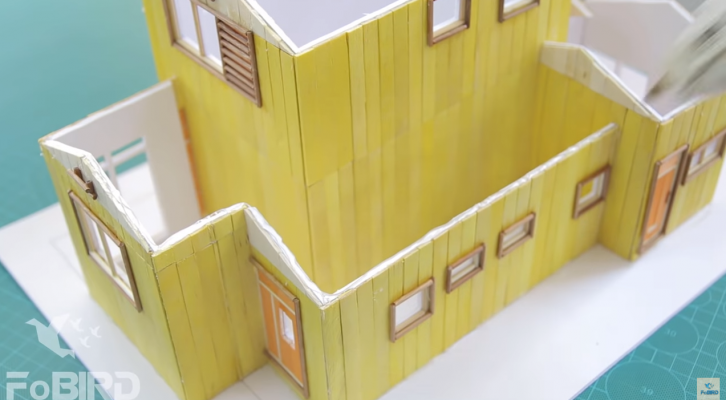
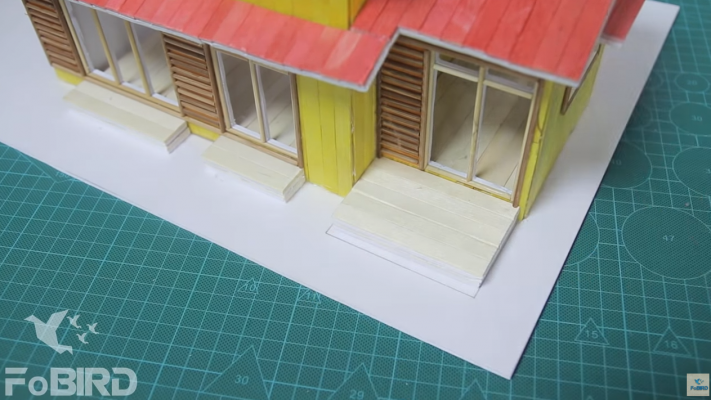
Use matboardthat has been cut into the size in the blueprint, attach it a little slanted upward to make the porch at the front and the right side of the house.
Carefully cut the sticks into smaller pieces to glue them to the entire porch.
At the back of the house, instead of making a porch, we attach a long ice cream stick that has the same height as the porch like the image above.

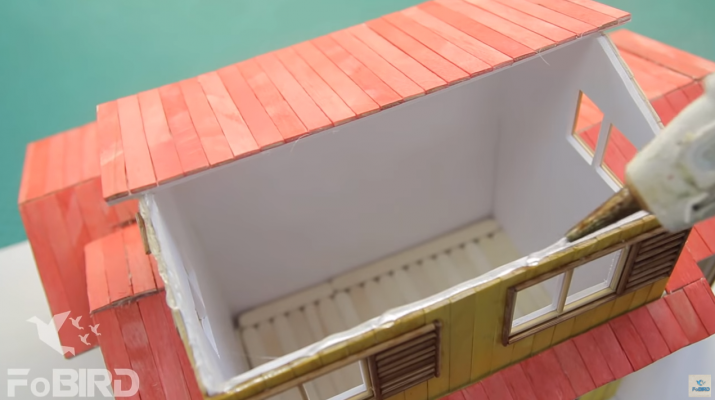
Continue using matboardto make the roof’s frame then cover it with ice cream sticks, similar to the previous steps. In this step, we only need to make sure that the sticks are straight and neat.
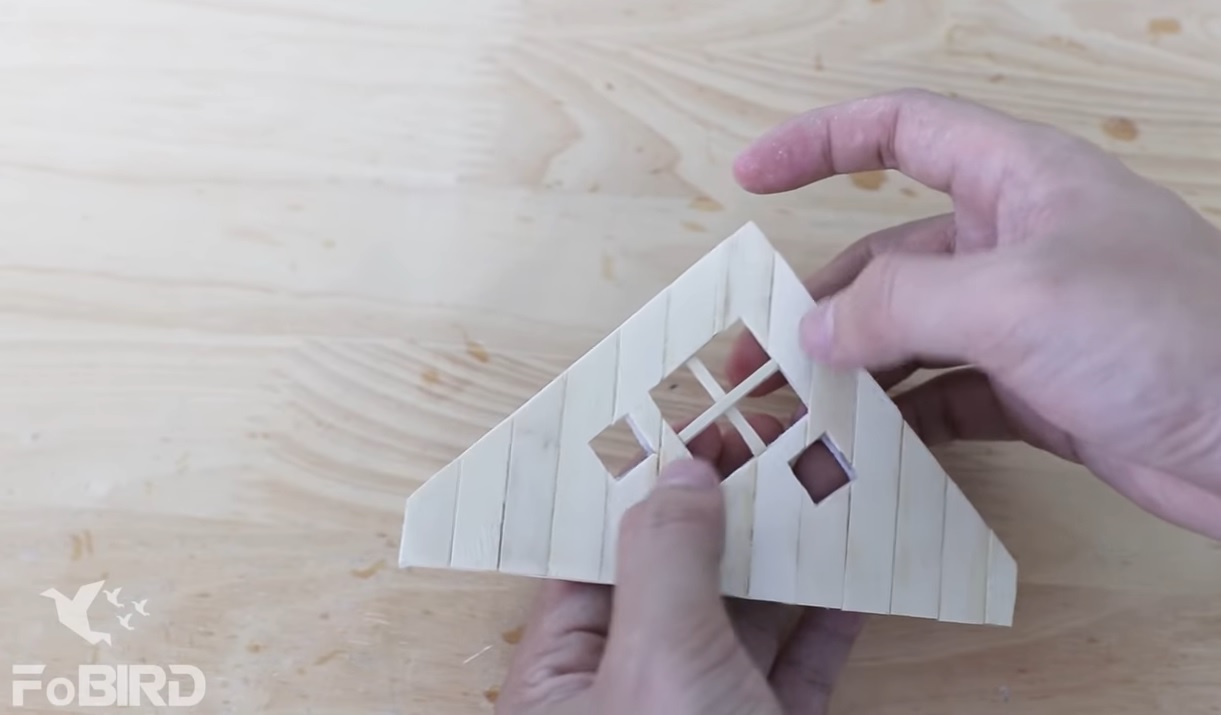
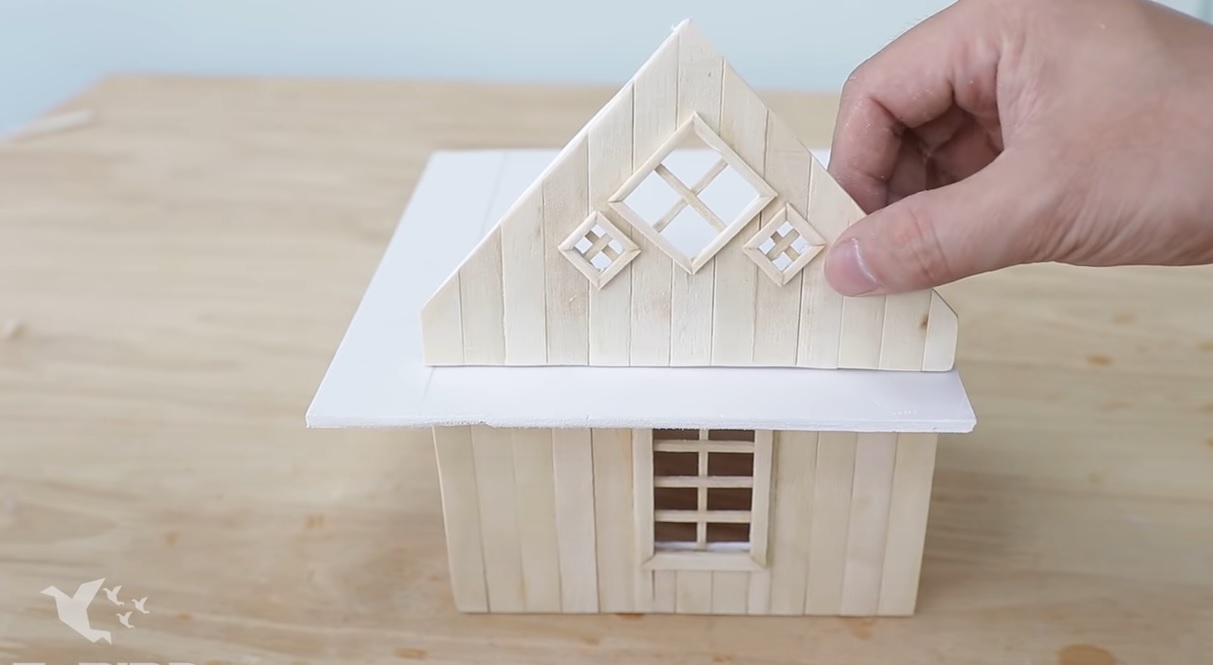
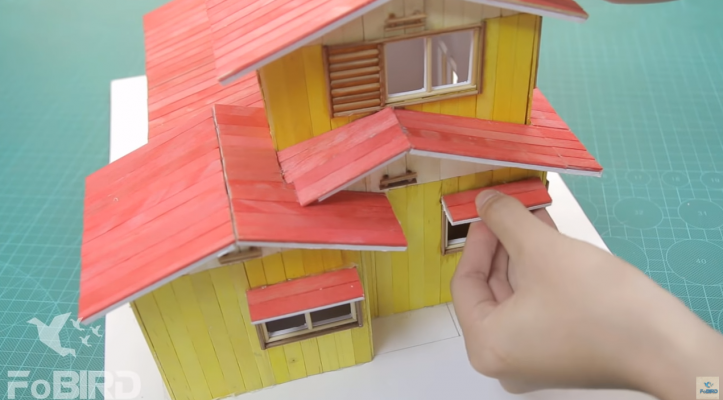
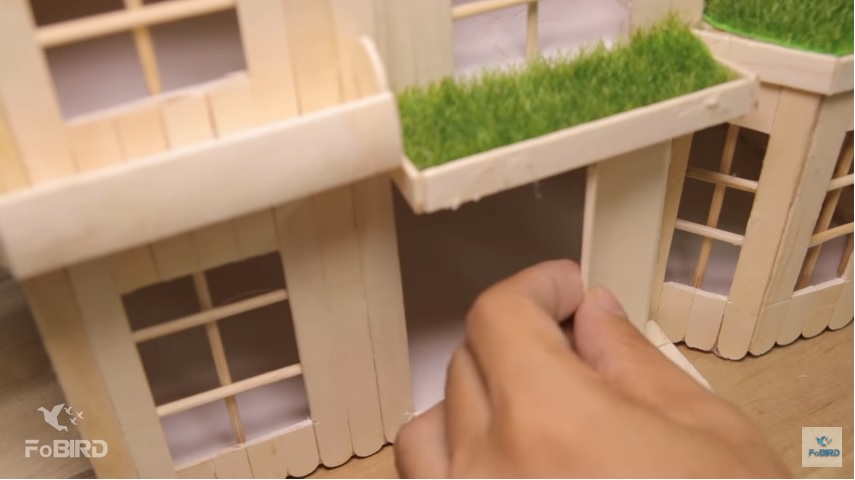
To make the roof less dull, we make a small attic window like this.
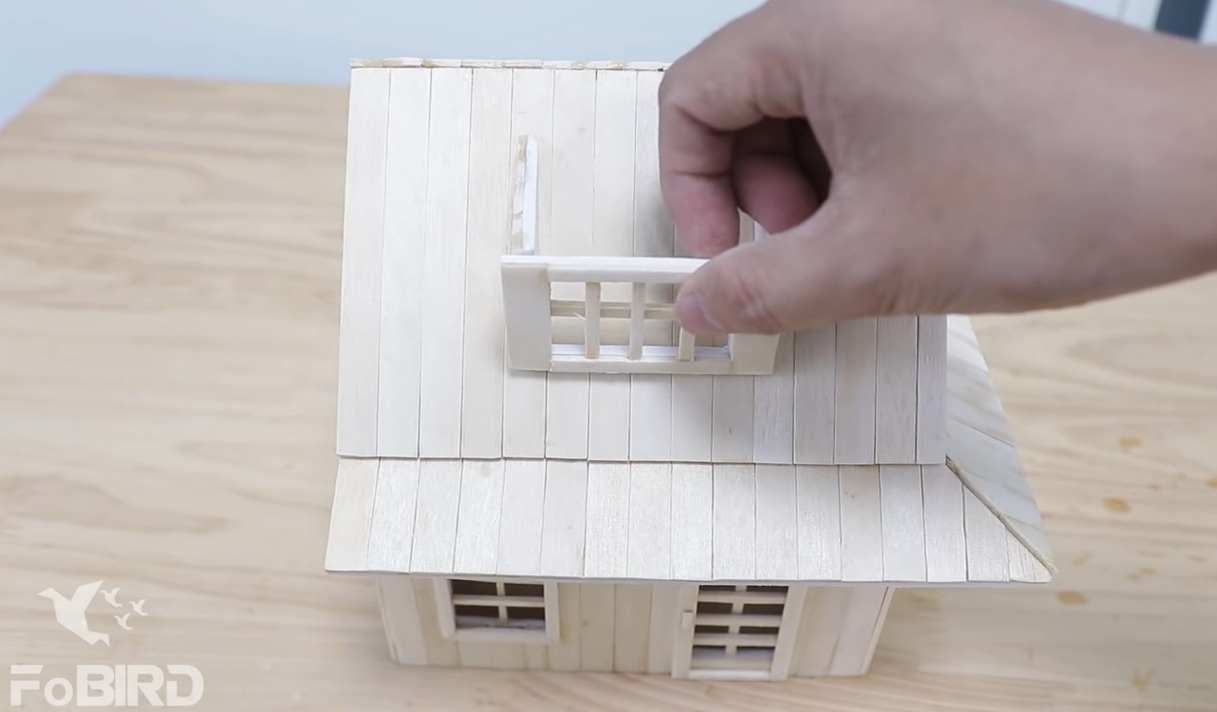
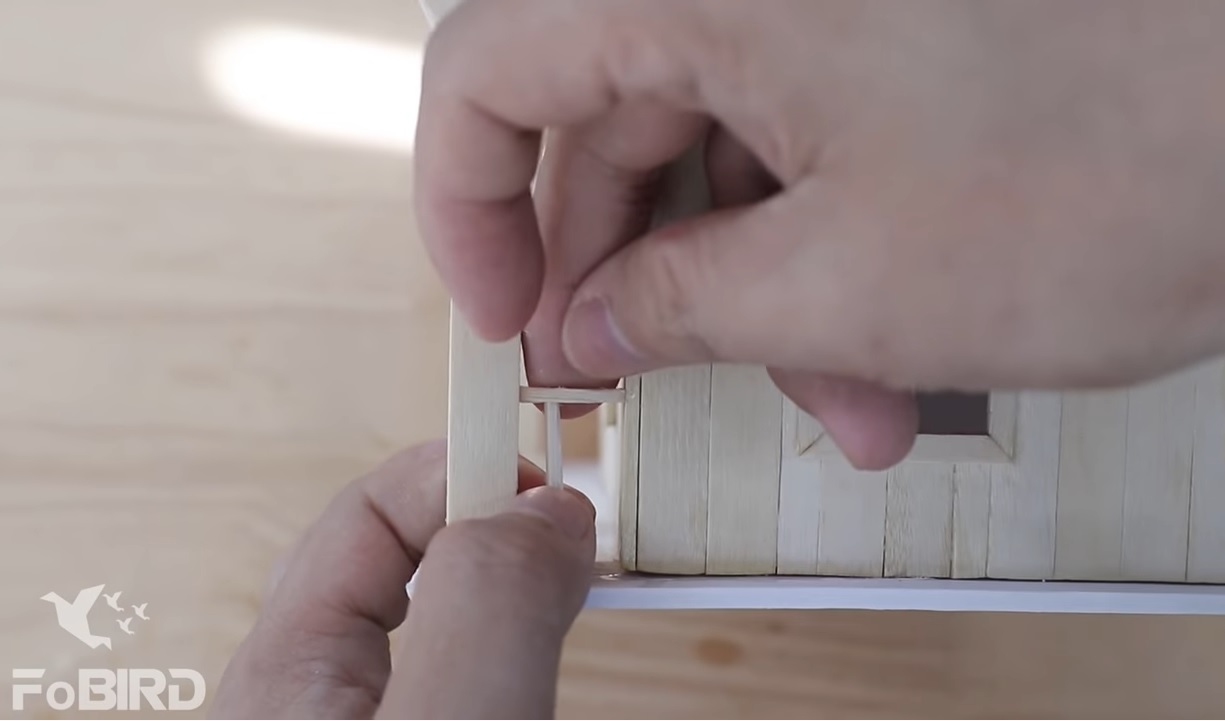
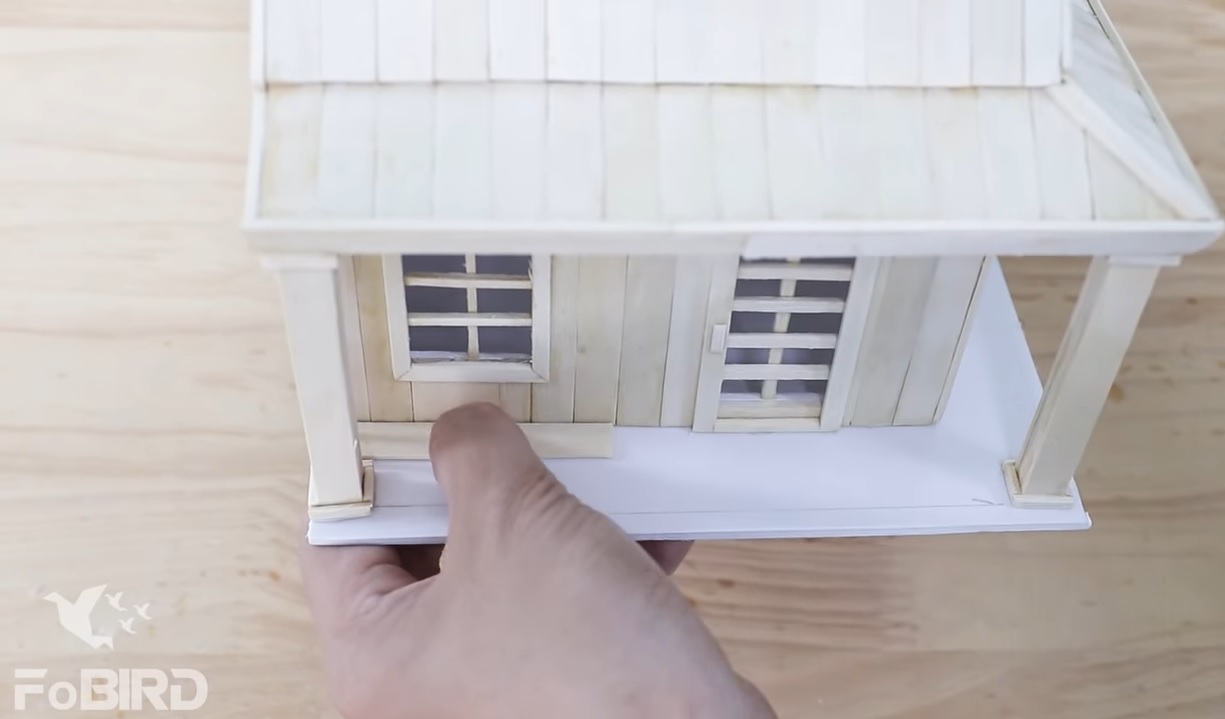
The next step is moving to make porch columns, banisters, and floor. Making columns is very simple, we use 4 same sized ice cream sticks, arrange the sides together perpendicularly to create a rectangular box, cut the sticks into smaller pieces then glue them to both ends of the box, and then attach them to 3 sides of the porch.

Using the small sticks to make the banisters like the image.
Next, we glue the wooden sticks alternately together to make the floor, as a result, we have finished the house model.
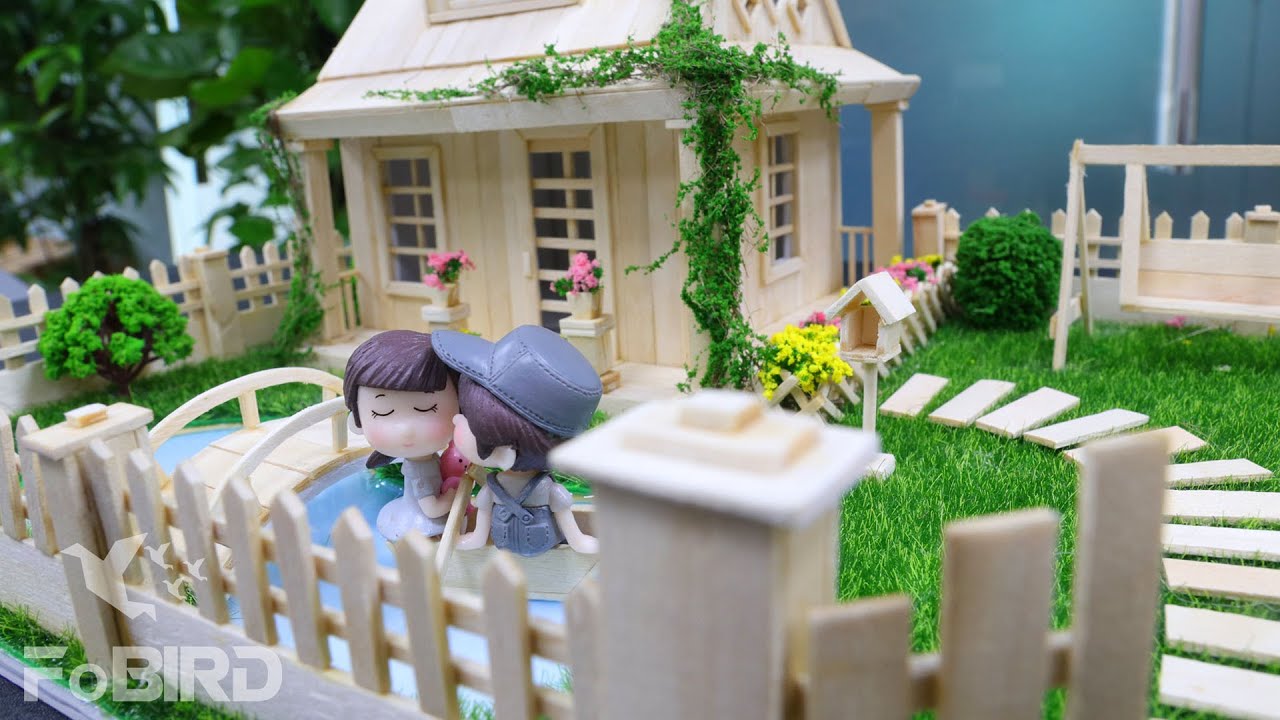
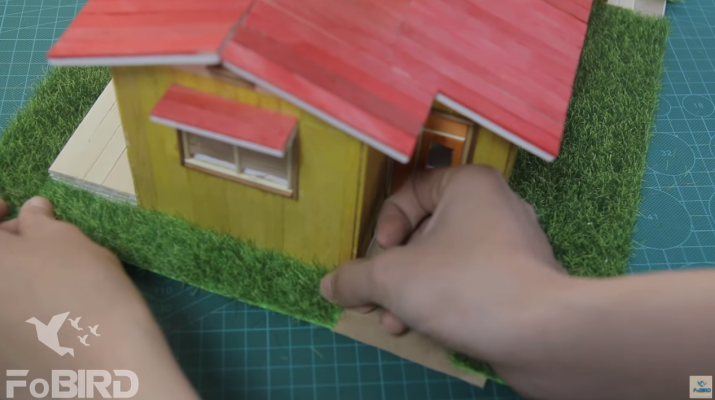
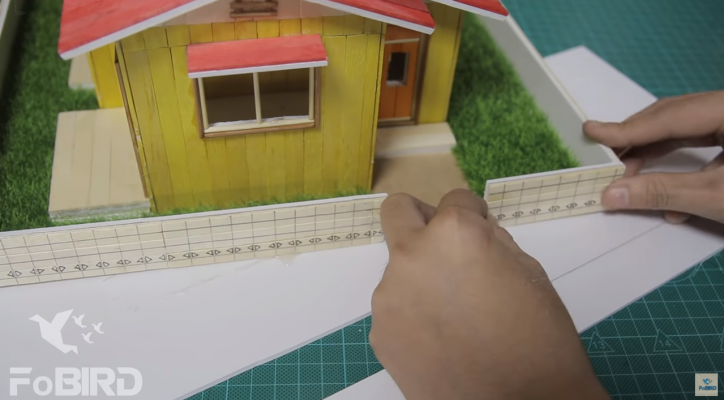
Moving to the next step, we will decorate the garden. First, make the lawn around the house, cut out a part to make a lake. Then make the fence surround the house and the gate. The gate and fence pillars are similar to the porch columns, just make them in a smaller size. About the fence, we use the craft knife to trim and sharpen one of the ends of the sticks, attach them evenly with a large stick below, and 2 horizontal bars in the middle like the image. You can make an X pattern fence or closed fence… depending on how you want to decorate your model.
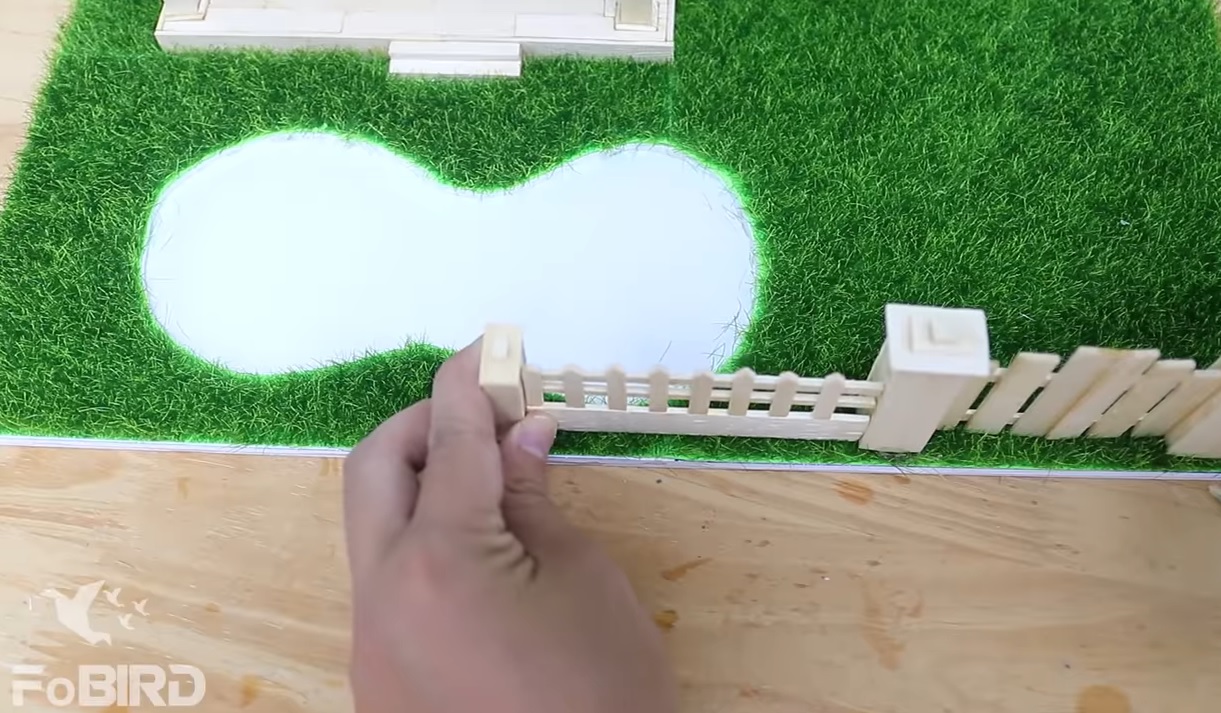
Join small wooden bars to make a tiny fence with an oval pattern to separate the flower bed. Bend a small matboardand add some sticks to make a pretty little bridge across the lake in front of the house.
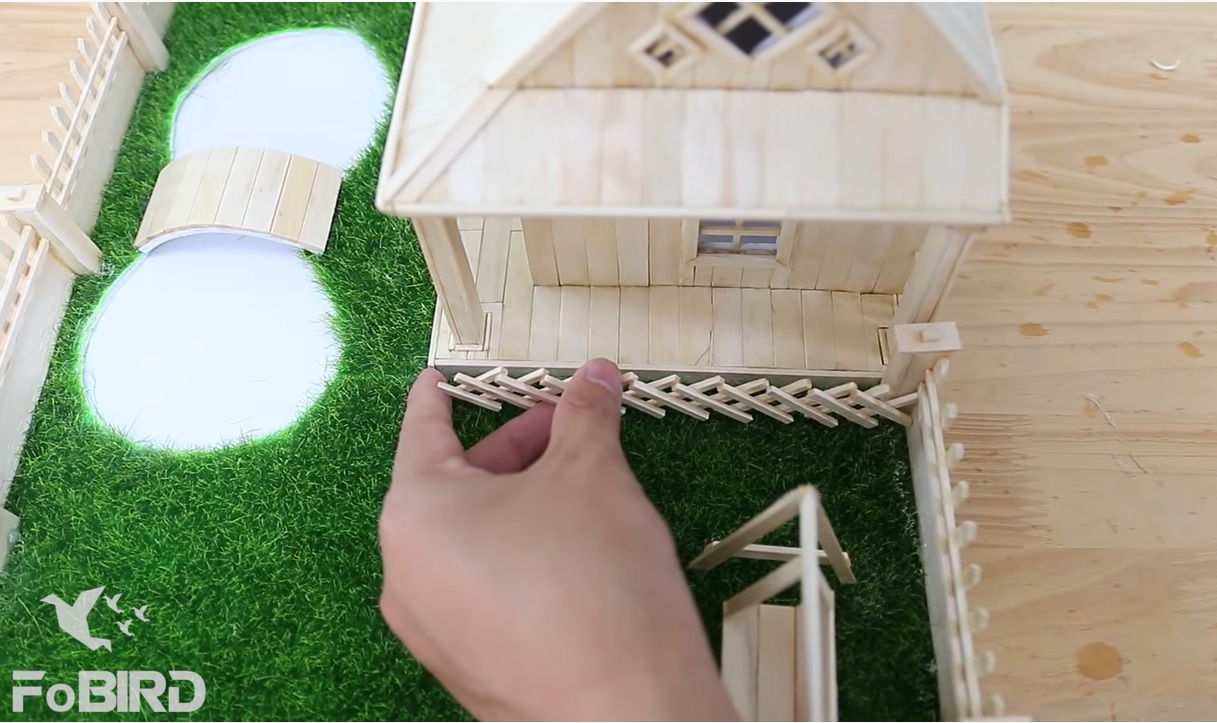
To make the garden even more beautiful, we trim the ice cream stick into a lamppost and make a small path from the gate to the front door of the house.
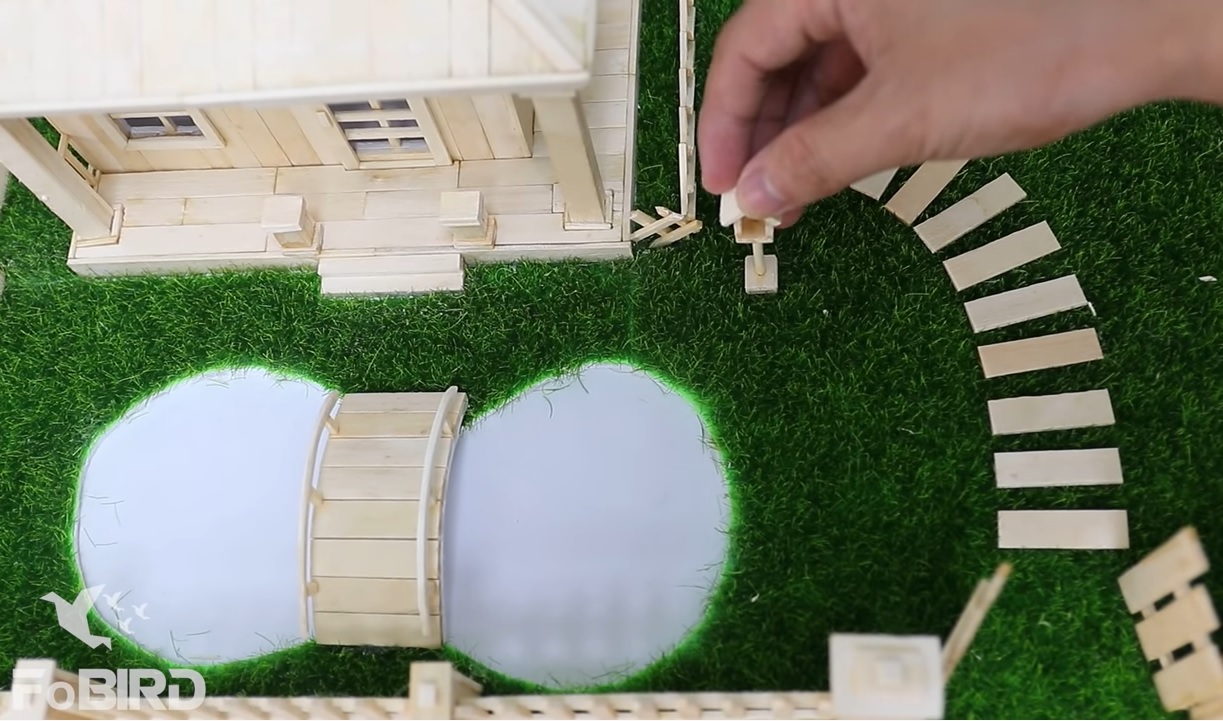
With this house making method, we use a piece of blue-colored paper to make the lake. Next, we use the glue gun to melt the glue stick to the paper to create the lake water.
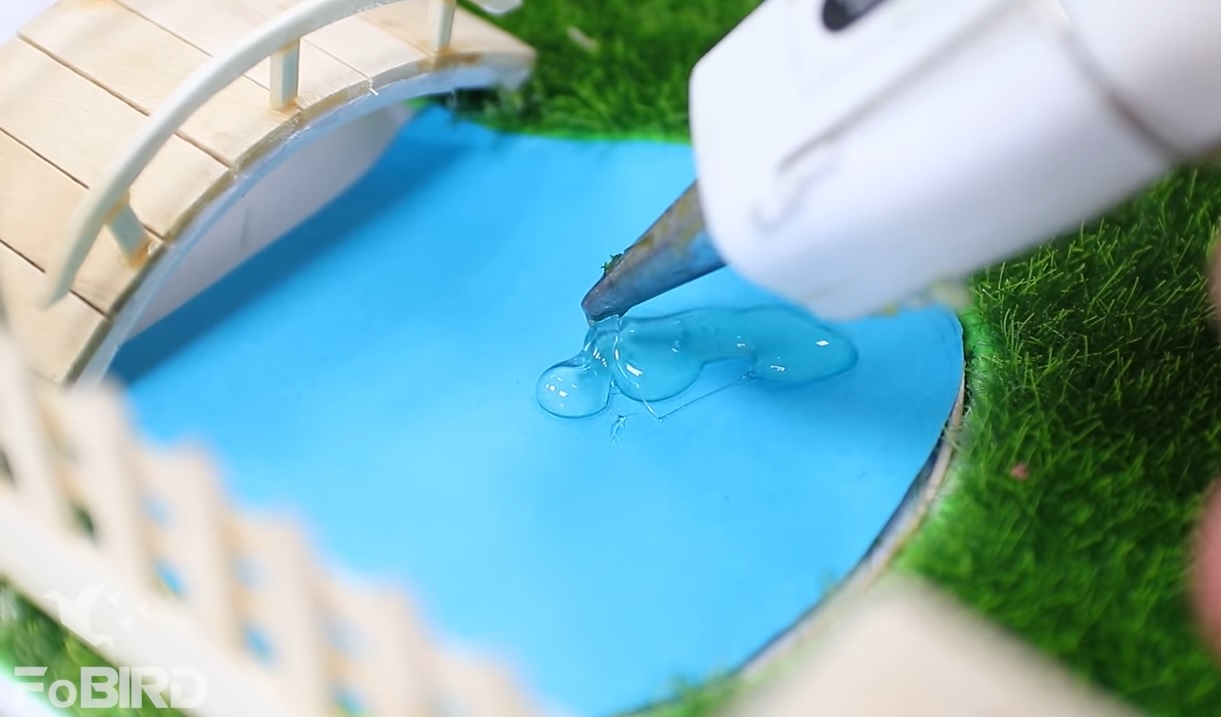
The last step is to complete the lake and add flowers, trees to decorate the garden, in addition to that, we put a set of vines on the roof to make the house stands out. We make a swing and place it on the side of the house or we can make a small flower garden instead, just keep arranging until you think the model is beautiful with harmonious colors.
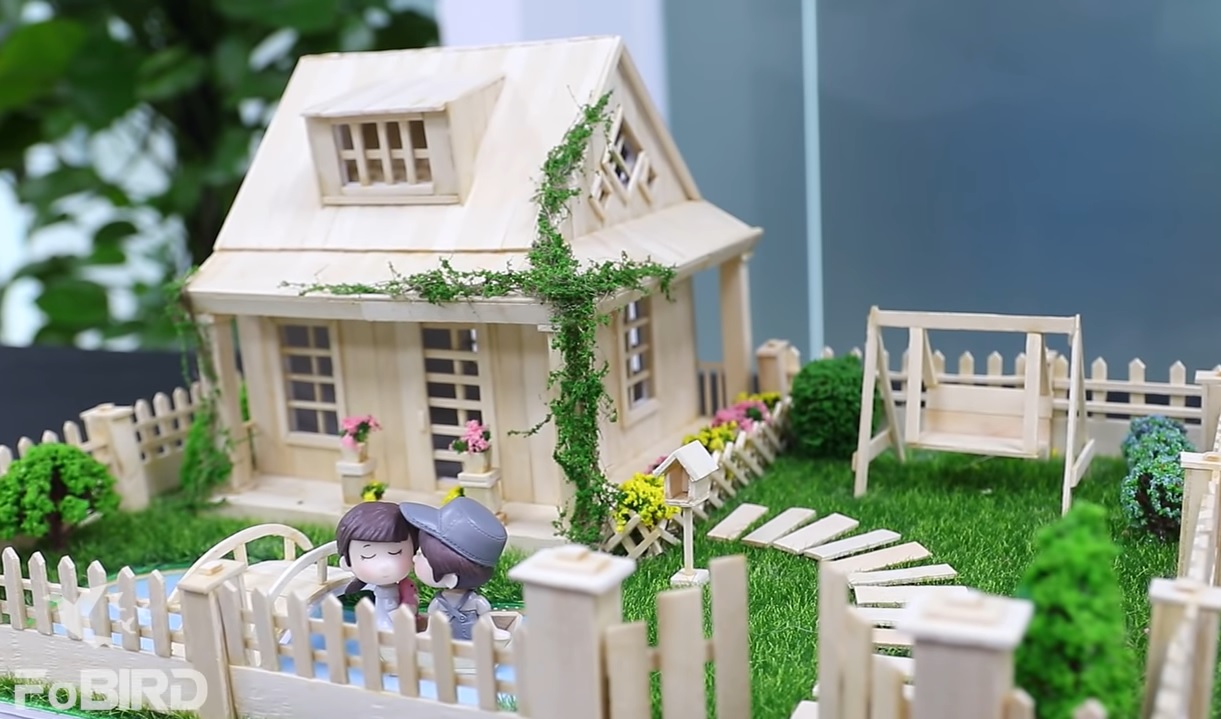
This is a simple way to make ice cream sticks house model. And here is our product, a small, cute, and simple house with a romantic garden filled with trees and a lake, on the water is a small boat and a couple enjoying the view. It took us 5 days in total to make this model, 2 days to form the idea and make the blueprint, 3 days to make the model. If you already have our blueprint then making the model becomes much simpler, you can finish this model in about 3 to 4 days. Good luck!
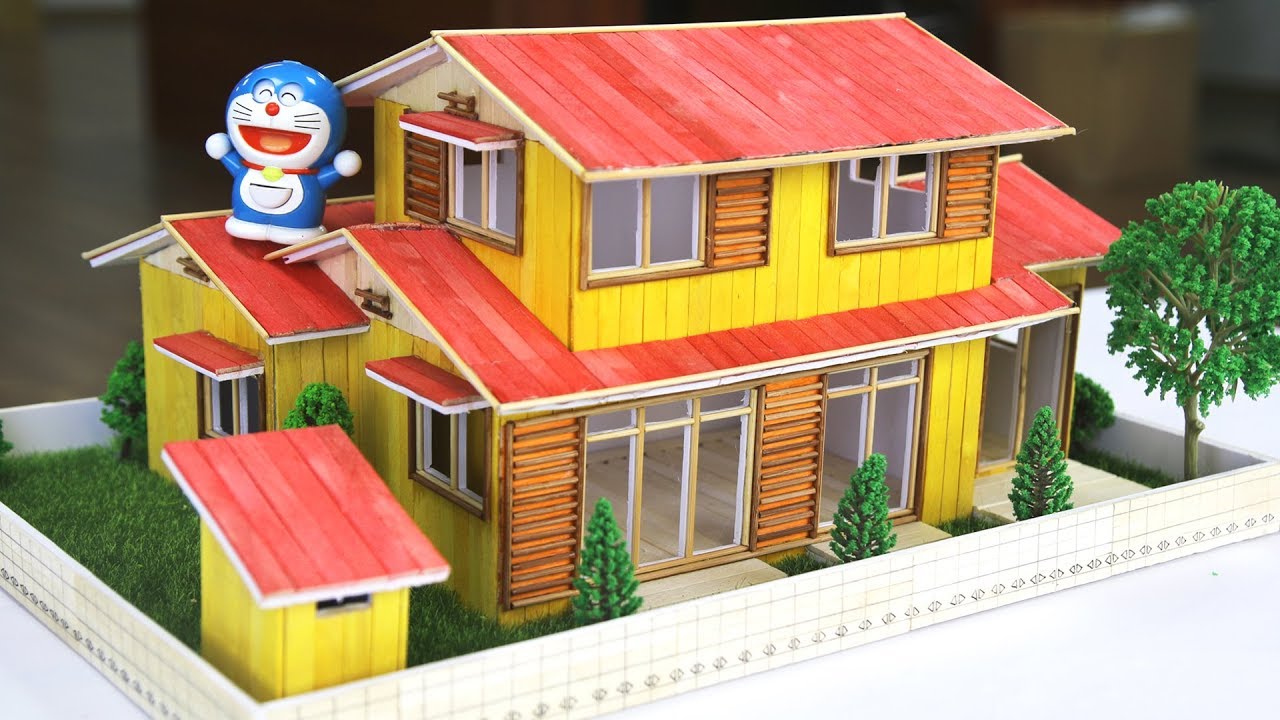
3/ The Popsicle stick Nobita and Dreamon’s house
Doraemon is a famous character that has been a part of everyone’s childhood. There is no way you can forget the warm house of Nobita and Doraemon. So, relive your childhood memory with FoBIRD.com! We will show you all the steps on how to make a model of Nobita and Doraemon’s house with colored popsicle sticks.
Link download the Popsicle stick house template and tutorial video
The materials you need are:
- Detailed sketch
- Wood popsicle sticks
- Colored popsicle sticks
- Brown and white toothpicks
- Plastic grass
- Tiny plastic trees
- Mat boards
- Glue gun and glue sticks
- Pencil, ruler
- Special scissor to cut toothpicks
- Surgical knife
Follow these steps to make Nobita and Doraemon´s house model:
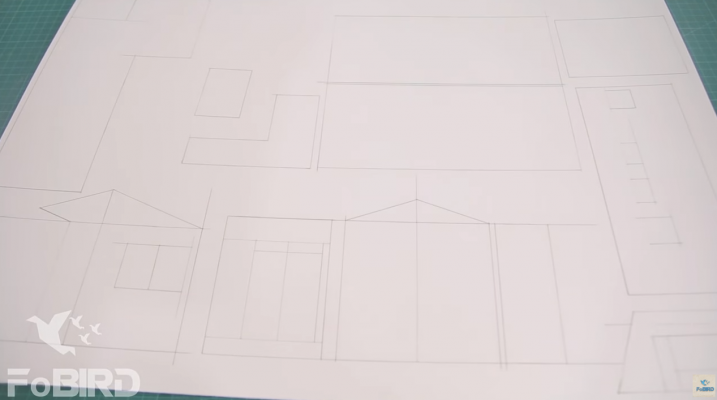
First, we need to draw a detailed sketch for the mat boards.
Cut toothpicks and colored popsicle sticks into small pieces and attach them to the mat board that you have prepared. Use surgical knife to cut off excessive parts inside of the windows.
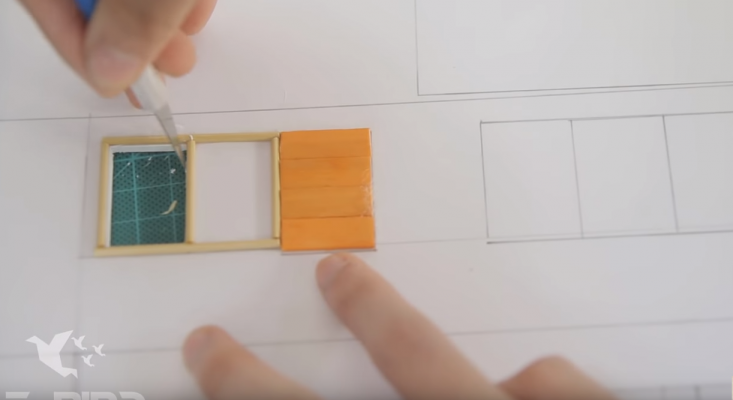
Continue to put colored popsicle sticks on the walls.
Just like that we glue colored popsicle sticks and toothpicks to make wall pieces of the house.
The second floor and the roof.
Make the other part of the roof and draw the foundation of the house on a mat board.
Next, we use surgical knife to separate the walls.
Join the details together according to the sketch. Remember to glue them tightly at 90degree.
Now move on to gluing the first floor.
For the floor inside of the house, first we use wood popsicle sticks to make a “skeleton”. Then we cover the foundation with wood popsicle sticks

After finishing the floor, unite all roof details together.
Now put on the window´s cover on top of them. Remember to tilt them a bit so they look more beautiful.
Now we use scissor to cut off both ends of wood popsicle sticks and join them together and make a box. This will be the porch. Measure the size of the doors before cutting the sticks to make the porch. That way it will fit perfectly.
Next, cover the entire yard with beautiful green but fake grass.
To make the surrounding wall for our Nobita´s house, we glue wood popsicle sticks on the mat board. Then we use pencil to draw on pattern. And finally, cut the board into long shape and place them outside of the grass field.
Finally, put in small trees and the warehouse on the yard for Nobita´s house. And now you have the dream house of childhood.
Are you reliving your childhood memory? Because we do. Having a Doraemon comic in our hands was wonderful. Many even got scolded by their parents for being too engaged in the comic. We hope that with this house, you can always save a part of your youth with you. Good luck!
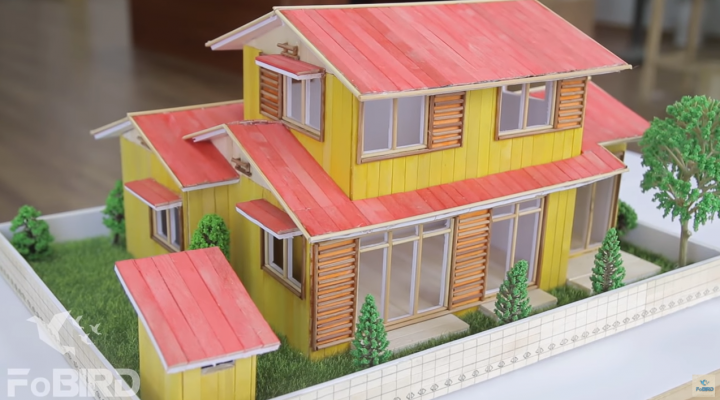
4/ The simplest way to make a Popsicle stick villa model with a garden and decorative light.
Link download the Popsicle stick house template and tutorial video
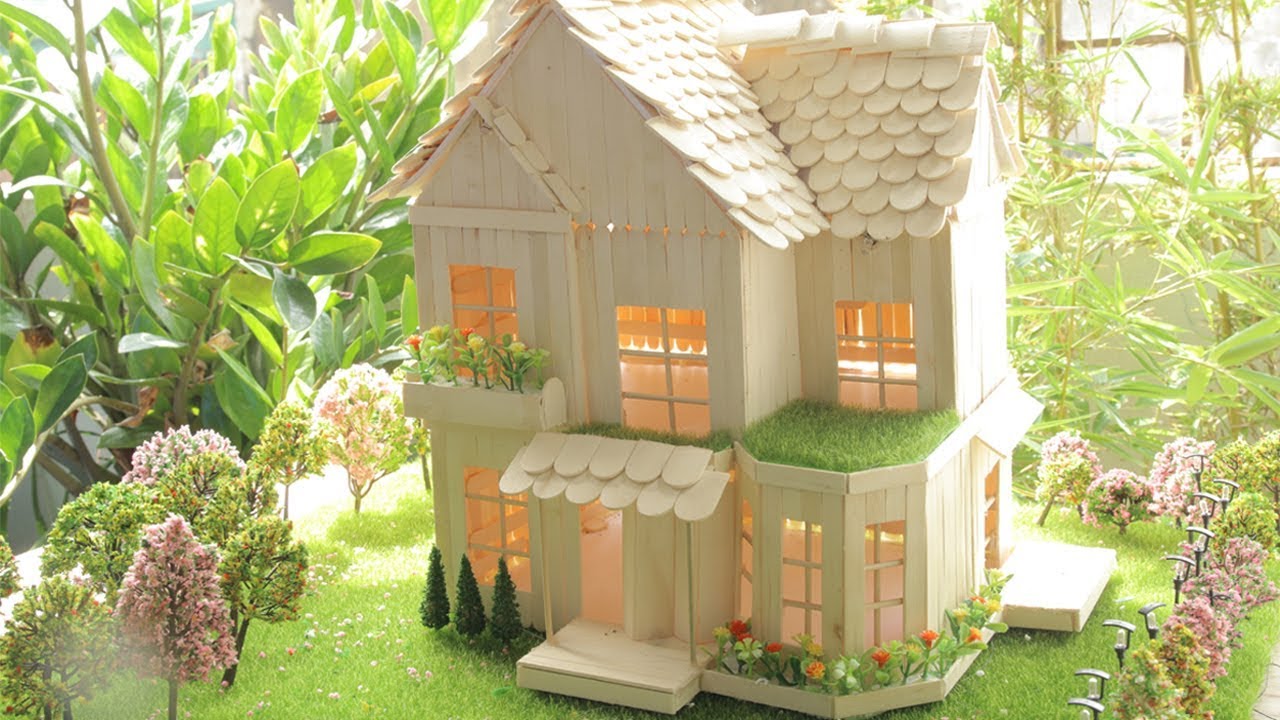
How to make a Popsicle Stick House and Garden
Materials to prepare:
- Mini glue guns
- 1*11.5 popsicle sticks: 2kg
- Carving knives
- 2*15.0 popsicle sticks: 1kg
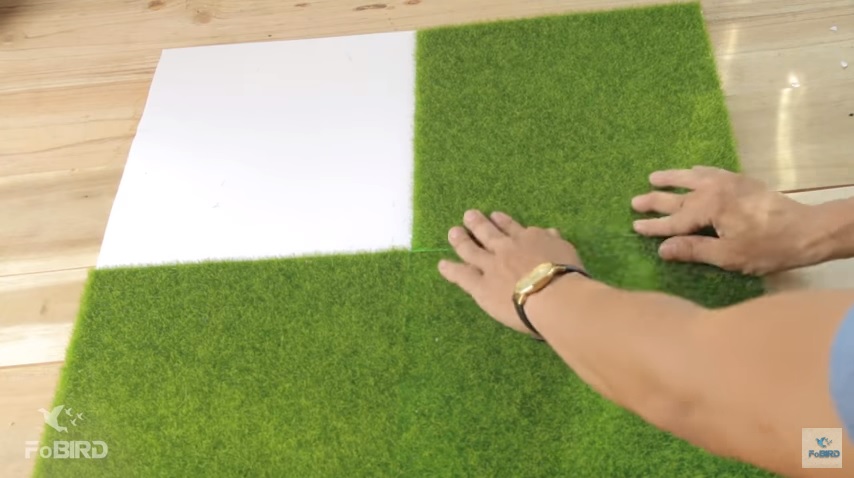
- Model grass lawn: 4 30*30cm panels
- Candle floss: 40 sticks
- Model cardboards: 2 30*60 pieces
- Decorative plants: one combo set
- Yellow LED: ten bulbs ( with resistors attached)
- Two decorative yellow and red flower bouquets
- Handmade battery packs
All above materials are accessible in the Model-Building Combo Set One
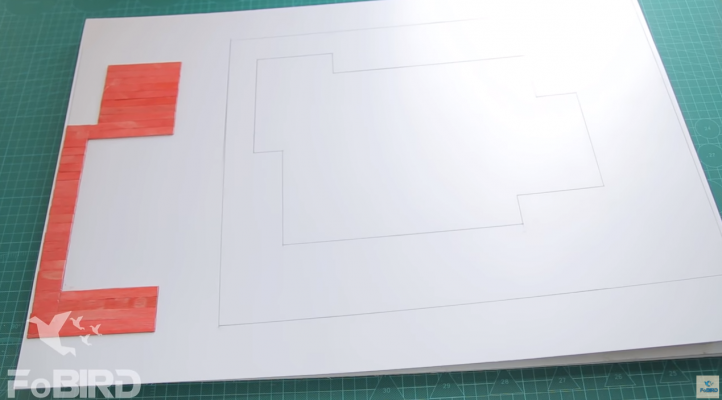
Step 1: Download the plan of this home, then cut a model cardboard with the same drawing size
Step 2: Use a glue gun to attach the candle floss onto a horizontal popsicle stick, then fast tighten eleven other sticks up vertically, making a wall..

For the wall to be firmly linked, include another stick to the back, parallel to the primary stick.
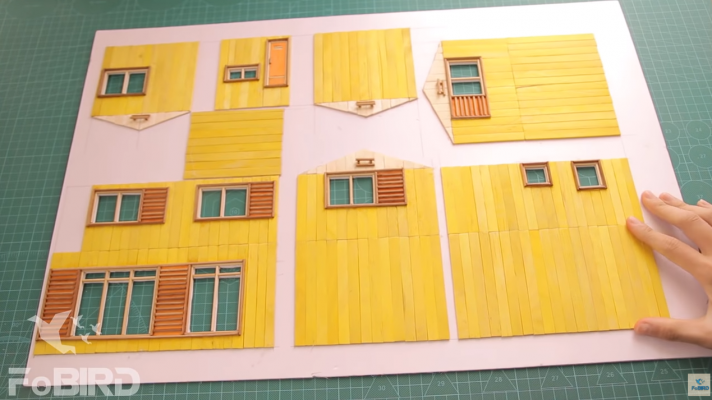
Step 3: Repeat the similar to create different pieces. Afterwards, link them combine to make a long wall.
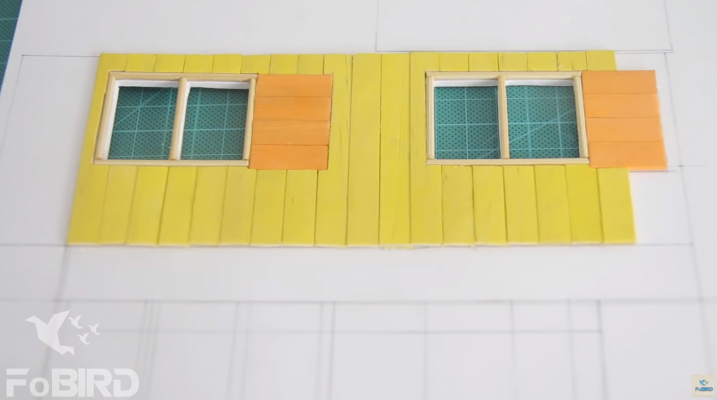
Step 4: in turn, link the panels to the model edges cardboard in Step one. At the edges with windows, use a knife to shape the windows. The window size is 4*6 cm, or you can guess the window size to be reasonable. The front door should be bigger than the window, it looks amazing that way..
To create the frame in the window, use a little round stick, cut it into little pieces and link them to the back of the window frame.
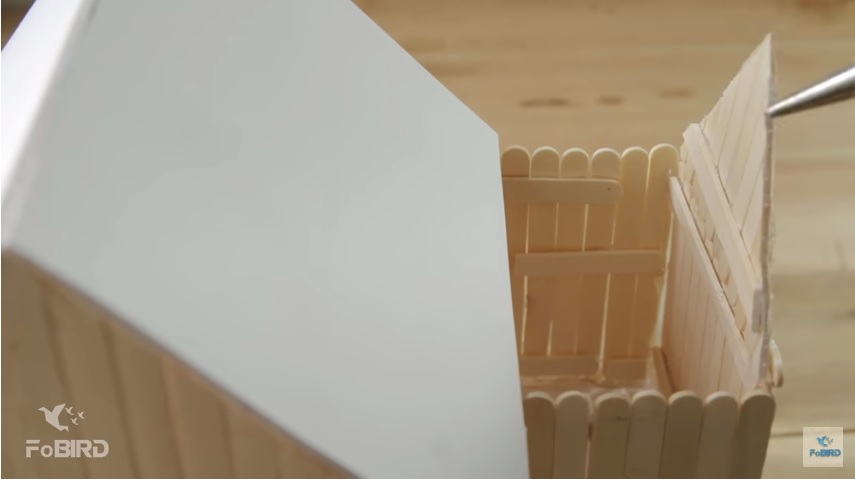
Step 5: After linking the walls around the edge of the mode, prepare another model piece cardboard, similar to the one in step one. Place it up as the floor of the 2nd floor.

Step 6: Continue using the popsicle to make walls. Bear in mind to leave area for the balcony.
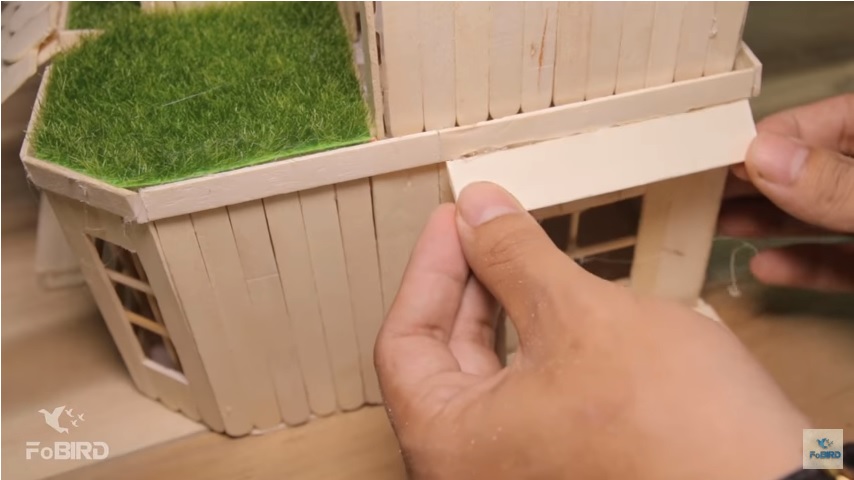
Step 7: At the junctions between the first and second floor, use 1*11.5 sticks with 2 rounded tips cut off, link them in to cover the spaces.

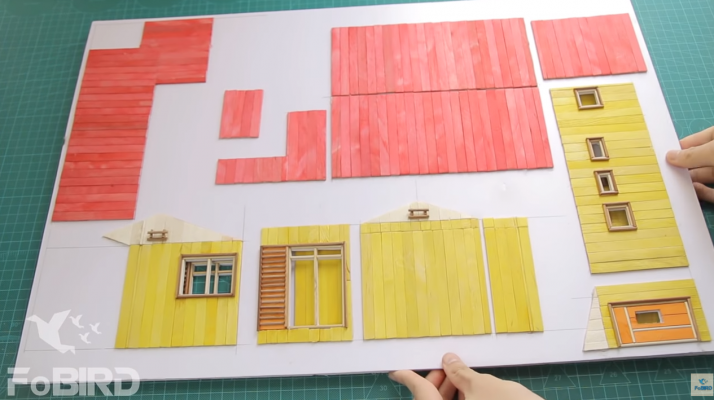
Step 8: Use a piece which is a mixture of a 19 sticks, guess from the highest point of the tenth, draw two lines diagonally to make a balanced triangle.
Step 9: Cut along the above two diagonal lines at step eight to make a triangle. Repeat similarly to create a second triangle.

Step 10: Attach these two triangle to the home, then link the model cardboard to make a framework for the roof.

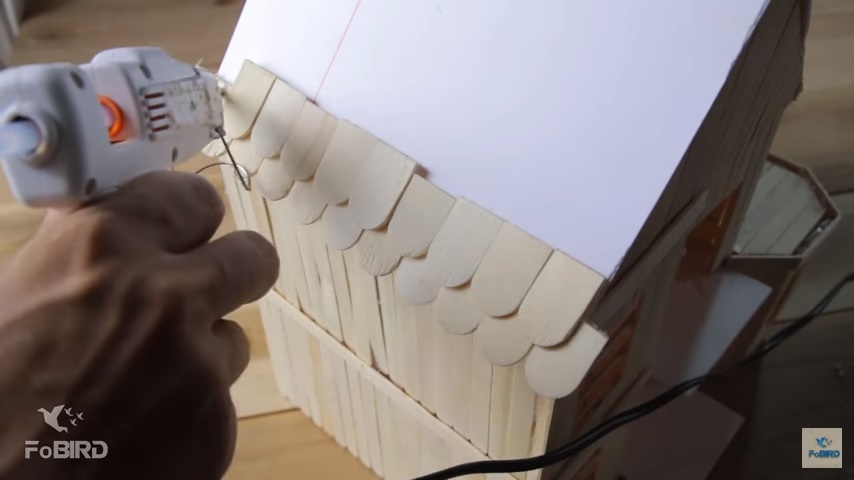
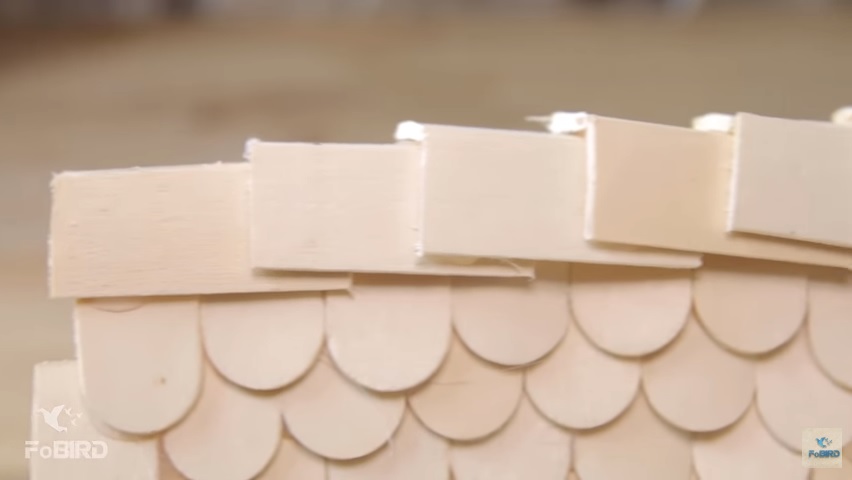
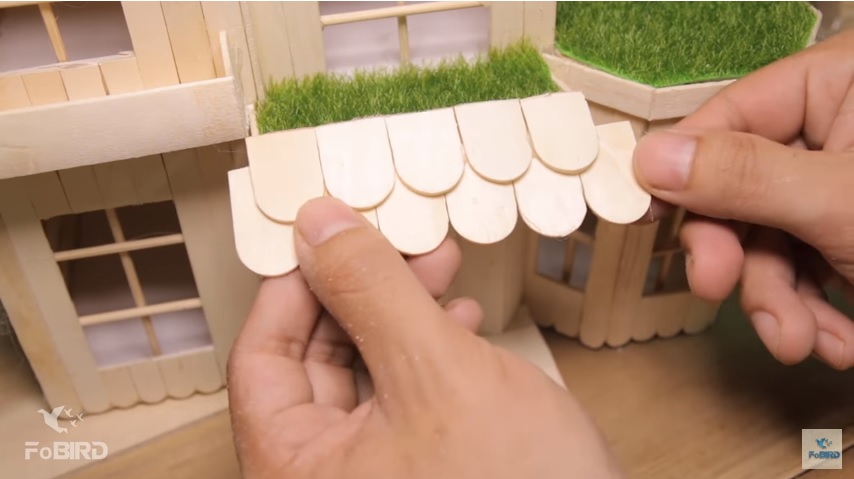
Step 11: Use scissors to shape the rounded tips of the 2*15.0 sticks, these sticks should overlap each other, making a thatched roof.
Step 12: Link the possible sticks to make a base plate like Step one. Then repeat similarly to step nine to make another triangle. Then link it to the model to make the right side of the roof for the home.
Step 13: Repeat step eleven to make the right roof of the home.

Step 14: To cover the junction between the 2 roofs, you can utilize the sticks whose two rounded tips were cut off (in step eleven), they are not just to cover the contiguous joints, but also to make a classic roofing effect for the home.
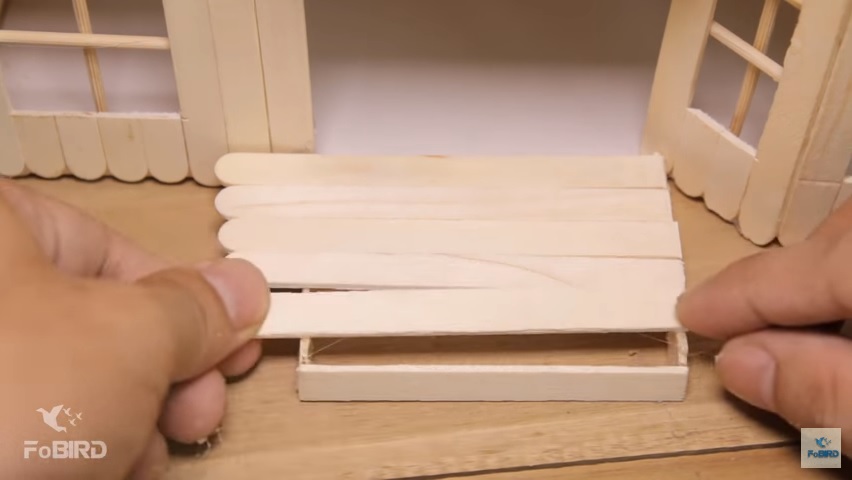
Step 15: Use 1*11.5 sticks to make steps in front of the home. Then use scissors to cut away pointless parts.
Step 16: Cut some decorative glass lawn pieces in little sizes to link onto balcony of the house.
Step 17: Link the door to the home. Here I also take benefit of the remaining sticks in step eleven..
Step 18: Also use the thatching technique to create the front porch. This thatched roof is located on a 2*15.0 stick with 2 rounded tips cut off. Ensure to guess so that the length of the stick is the same as the length of the face porch.
Step 19: Turn the home to its right side, use one 2*15.0 stick with its 2 rounded tips cut off to create the right porch for the home.
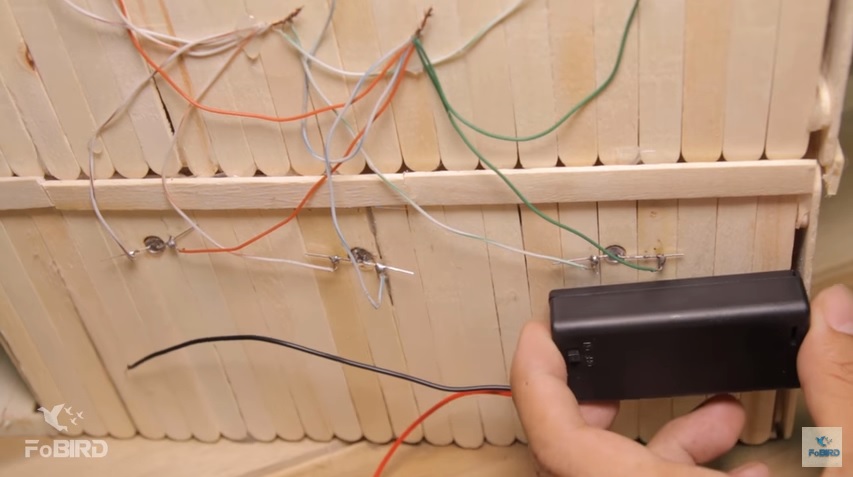
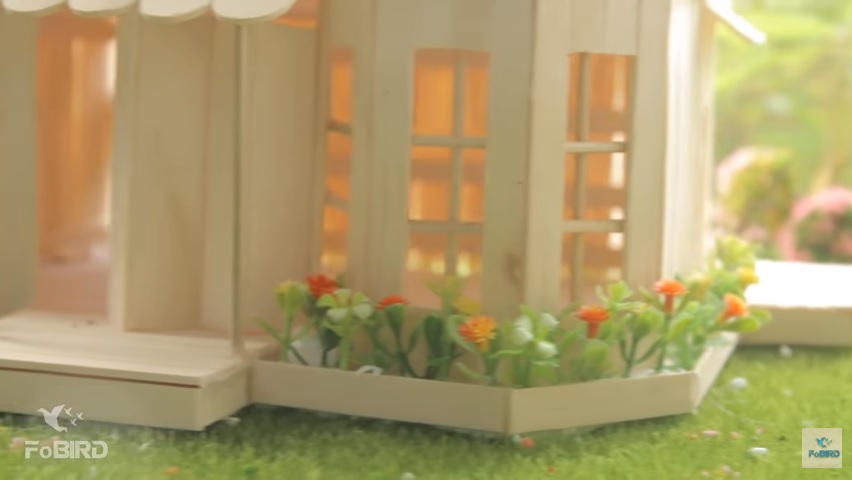
Step 20: Use a little drill or a quick screwdriver, drill holes behind the home to insert LED lights.
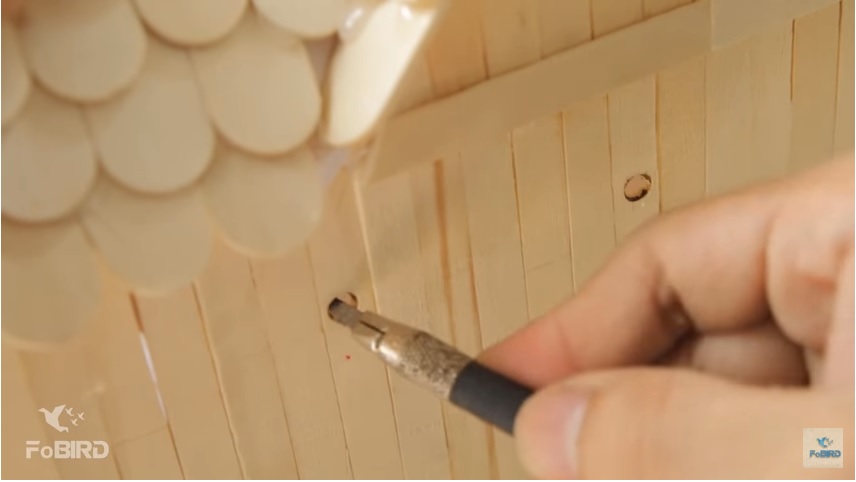
I use stunning LEDs with a diameter of 5mm, therefore the holes required drilling should be 5mm in diameter, add the LEDs afterward. Bear in mind, the negatives should be on single side, while the positives are on another. That will make it more suitable when writing.
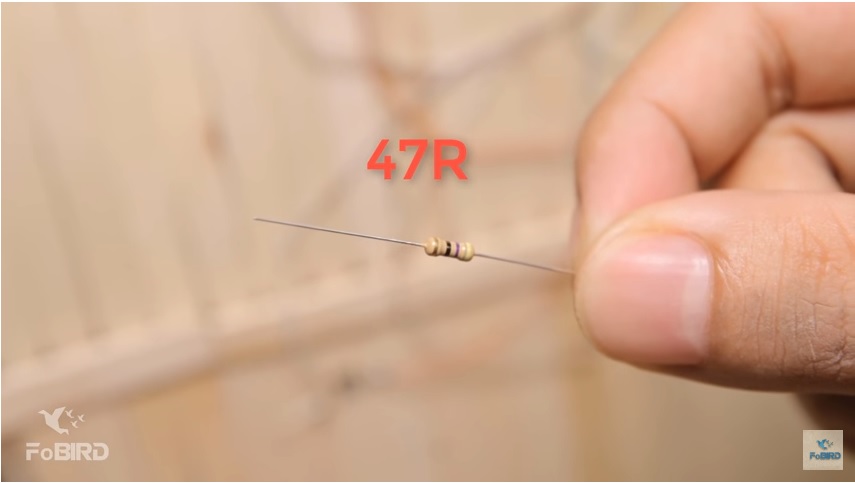
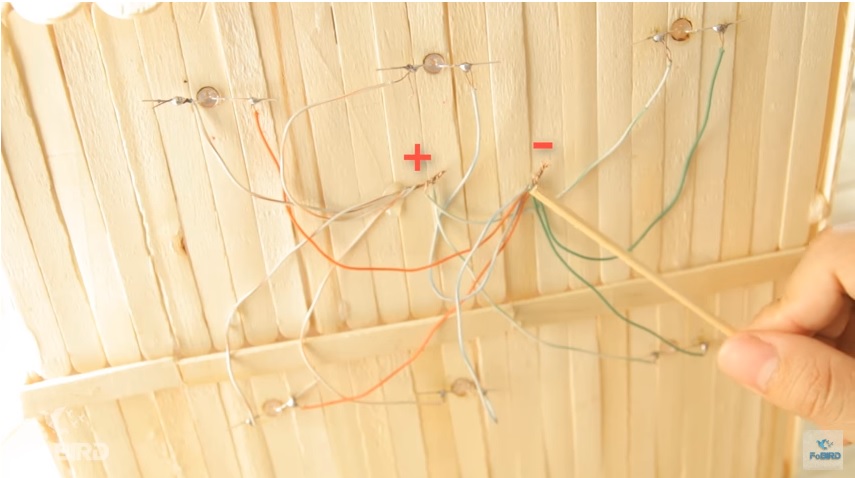
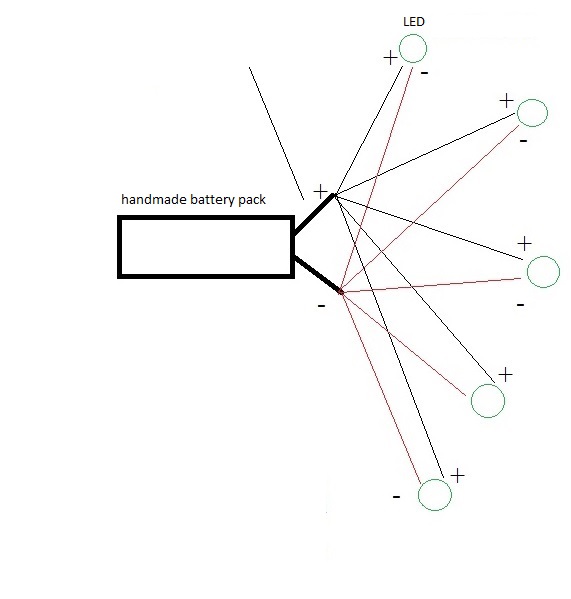
Step 21: The LEDs are joined in a parallel way. Using a yellow LED, gathered handmade power pack. We should have also install a resistor on the circuit.
![]()
The handmade battery pack will be installed as below
Step 22: Use a large 60*60cm model cardboard (or it would be firmer if you use a 3-5mm thick wooden board as foundation), use a glue gun to attach four 30*30 grass pieces onto it.
Step 23: Use the combo set of decorative plants to make a forest surrounding the house

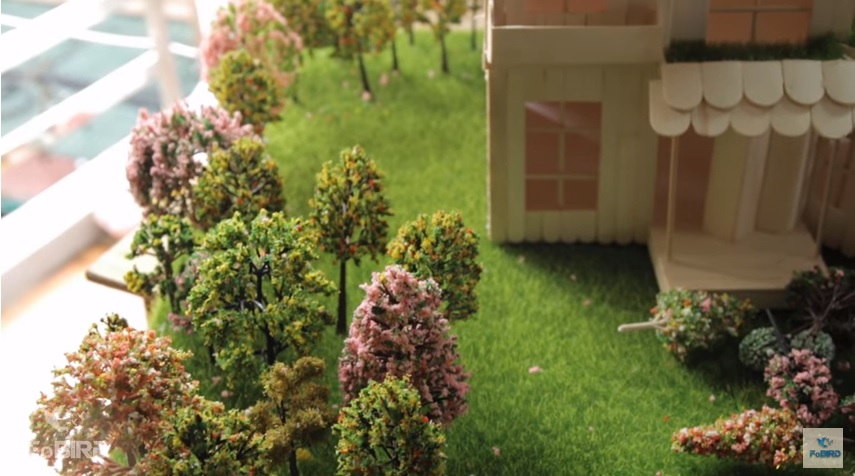
After having put down the trees, don’t throw away the unused trees in the combo set just yet. These junk trees can be used to scatter around the lawn to create leave-fall effects
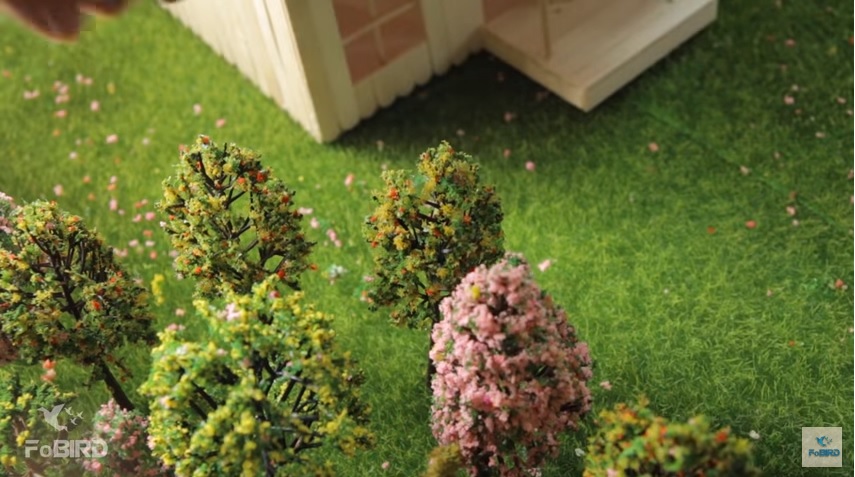
Step 24: Make some additional flower pots for the model, using plastic decorative flowers. Below the pots is a piece of foam to keep the flowers in place.
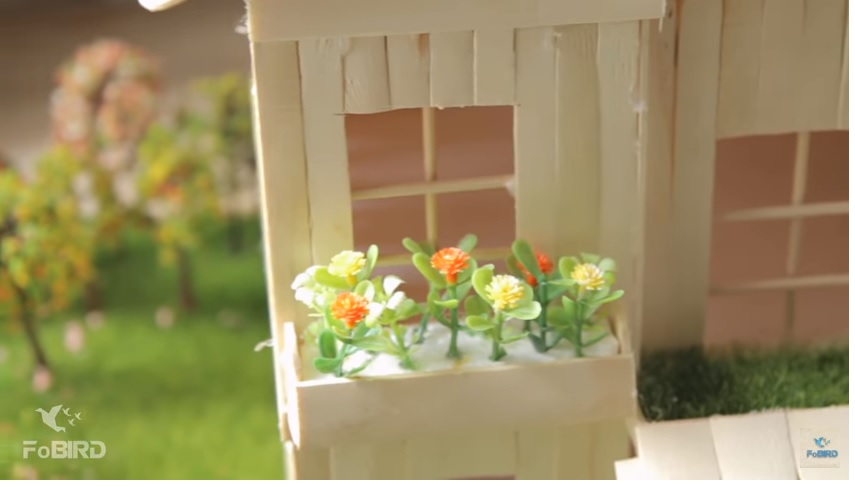
Step 25: Similar to Step 24, make some flower pots around the model to make it more robust and colorful.
Step 26: Put down a line of trees on the right side of the model, alongside a street lamp post. This light can be turned on and it will light up very brightly.
![]()
Above are the steps to make a popsicle stick house. To better understand the steps, you can refer to the video “How to make a Popsicle Stick House and Garde”:
FoBird
FoBiRD is our YouTube Channel where we make lots of DIY projects for you. If you are interested in DIY popsicle stick house the feel free to visit our YouTube channels and if you like our videos do not forget to subscribe our channel.
Popsicle stick crafts
With the support of this amazing video tutorials, you will learn how to make perfect little bird feeders out of popsicle sticks and Elmer glue. Best for all those pretty birds we love to view in our yards since things are warming up a bit.
Popsicle stick bracelets
These popsicle stick bracelets are definitely adorable. Young girls like to accessorize. They are best craft for girls to make Girl Scout, camp, birthday party or sleepover. Using minimal supplies, they are simple, and they can make as many as their hearts want.
Our YouTube channels is a great place to ask questions on how make things or for specific tutorials that you are looking for. Definitely, it is amazing to watch them.
By: FoBIRD.com